Overview
Ansible is an IT automation tool. It can be used for configuring system, deploying software, or orchestrating more advanced IT taskssuch as continuous deployments.
Before we followed the instructions, we must prepare these as prerequisites.
Prerequisites
- EC2 AWS (In this simulation, i use 3 instances. (2 ubuntu – 1 master and 1 target; 1 centos – as target).
- Installed ansible tool on master instance.
- Stored the master’s instance public key to authorized key foreach target both ubuntu and centos
- IAM Access and Permission
Implementation
Traditional Way!
Conventionally, we use static inventory file for listing our target host.
As example:
$ cat /etc/hosts
| localhost 127.0.0.1 |
| localhost.domain 127.0.0.1 |
$ cat inventory
[group]
localhost
localhost.domain

[target1]
localhost

[target2]
localhost.domain
We define our target hosts here. You may feel confused why localhost and localhost.domain directed to the same target. It’s just example and let’s assume target1 and target2 define from master’s instance and has different IP.
When we were using Virtual Private Server (VPS) from various kind of cloud computing provider such as Alibaba Cloud, Microsoft Azure, Google Cloud Platform, Amazon Web Service, Digital Ocean, etc. It’s important to see it as case. If we shutdown the instance and don’t set the static IP for the VPS. It will need to modify the scripts. In the other hand, it’s additional cost if we want to set it as static IP. So, we won’t use static IP.
No More, Leave the Traditional Way!
In this simulation, we will use EC2 AWS.
Let’s start to pull this repository first.
Go to the repository and run this command to install the required dependencies.
$ sudo pip install -r ansible/requirements.txt
After that, need to export some variables.

AWS_ACCESS_KEY_ID & AWS_SECRED_ACCESS_KEY are used to be security credential for AWS.
EC2_INI_PATH is ec2.ini file path that already pulled from repository above.
ANSIBLE_INVENTORY is inventory, since it’s going to use dynamically, we will define python file path on it.
Here are the tasks we wanna set:
- Generate public-private key first on local env.
- Add user to target host.
- Create new file in /etc/sudoers.d that we will use for another sudoers file and it will be created on the directory of target host.
- Send public key which generated before as authorized key to the target host. (1 user with 1 keypair)
Notes:
1. Be careful on your user list txt file
2. Take attention on hosts value e.g. tag_name_target_ubuntu_1
Here are the result when executing ec2.py.
"tag_Name_target_centos_1": [
"54.251.130.121"
],
"tag_Name_target_ubuntu_1": [
"18.136.103.182"
]
It show that we have 2 instances. Now, create the playbook script named [Test]MyPlaybook.yml.
# How to Run: ansible-playbook -i [ec2.py full path/current place] [your playbook]
# ansible-playbook -i ./ec2.py [Test]MyPlayboook.yml
# pwd : /home/ubuntu/ansible/files/
# ls: playbook, user file .txt, directory public, directory all.
# Make sure that ~/.bash_profile is filled by export variable for inventory needs
# after playbook'd been executed, we can login by:
# ssh -i privatekey_user user@targetHost
# example: user: john-doe, targethost: localhost
# ssh -i john-doe john-doe@localhost
---
- hosts: localhost
  connection: local
  gather_facts: no
  vars:
    file_contents_lines: "{{ lookup('file', './userkoh.txt').splitlines() }}"
  tasks:
  - name: Checking variable that will be used.
    debug:
      msg: "{{ item }}"
    with_items: "{{ file_contents_lines }}"

  - name: Generate Keypair
    openssh_keypair:
      path: "/home/ubuntu/ansible/files/all/{{ item }}"
      size: 2048
    with_items: "{{ file_contents_lines }}"

  - name: Copy file with owner and permissions
    copy:
      src: "{{ item }}"
      dest: "/home/ubuntu/ansible/files/public/"
      owner: root
      group: root
      mode: '0644'
    with_fileglob:
    - "/home/ubuntu/ansible/files/all/*.pub"

- hosts: tag_Name_target_ubuntu_1
  gather_facts: no
  become: yes
  remote_user: ubuntu
  vars:
    #python -c 'import crypt; print crypt.crypt("LoveIsMagic", "$1$SomeSalt$")'
    #$1$SomeSalt$o0UIksgjfUrQg/oHIziLc.
    mypasswd: $1$SomeSalt$o0UIksgjfUrQg/oHIziLc.
    new_file: sudoers2file
    file_contents_lines: "{{ lookup('file', './userkoh.txt').splitlines() }}"
  tasks:
  - name: Add users txt
    user:
      name: "{{ item }}"
      shell: /bin/bash
      password: "{{ mypasswd }}"
      state: present
      system: yes
      createhome: yes
      home: "/home/{{ item }}"
    with_items: "{{ file_contents_lines }}"

  - name: create new file in sudoers.d
    file:
      path: "/etc/sudoers.d/{{new_file}}"
      state: touch
      mode: 0644

  - name: Allow 'userbiasa' to have passwordless
    lineinfile:
      dest: "/etc/sudoers.d/{{new_file}}"
      state: present
      regexp: ^%"{{ item }}"
      line: "%{{ item }} ALL=(ALL) NOPASSWD: ALL"
      validate: 'visudo -cf %s'
    with_items: "{{ file_contents_lines }}"

  - name: Set up authorized keys for the users
    authorized_key:
      user: "{{ item }}"
      state: present
      key: "{{ lookup('file', '/home/ubuntu/ansible/files/public/{{item}}.pub') }}"
    with_items: "{{ file_contents_lines }}"

- hosts: tag_Name_target_centos_1
  gather_facts: no
  become: yes
  remote_user: centos
  vars:
    #python -c 'import crypt; print crypt.crypt("LoveIsMagic", "$1$SomeSalt$")'
    #$1$SomeSalt$o0UIksgjfUrQg/oHIziLc.
    mypasswd: $1$SomeSalt$o0UIksgjfUrQg/oHIziLc.
    new_file: sudoers2file
    file_contents_lines: "{{ lookup('file', './userkoh.txt').splitlines() }}"
  tasks:
  - name: Add users txt
    user:
      name: "{{ item }}"
      shell: /bin/bash
      password: "{{ mypasswd }}"
      state: present
      system: yes
      createhome: yes
      home: "/home/{{ item }}"
    with_items: "{{ file_contents_lines }}"

  - name: create new file in sudoers.d
    file:
      path: "/etc/sudoers.d/{{new_file}}"
      state: touch
      mode: 0644

  - name: Allow 'userbiasa' to have passwordless
    lineinfile:
      dest: "/etc/sudoers.d/{{new_file}}"
      state: present
      regexp: ^%"{{ item }}"
      line: "%{{ item }} ALL=(ALL) NOPASSWD: ALL"
      validate: 'visudo -cf %s'
    with_items: "{{ file_contents_lines }}"

  - name: Set up authorized keys for the users
    authorized_key:
      user: "{{ item }}"
      state: present
      key: "{{ lookup('file', '/home/ubuntu/ansible/files/public/{{ item }}.pub') }}"
    with_items: "{{ file_contents_lines }}"
For the user list, we will create new file named userkoh.txt
# cat userkoh.txt
havana
savana
zuvana
ivana
Execute it by:
$ sudo ansible-playbook -i ./ec2.py [Test]MyPlaybook.yml
Result:

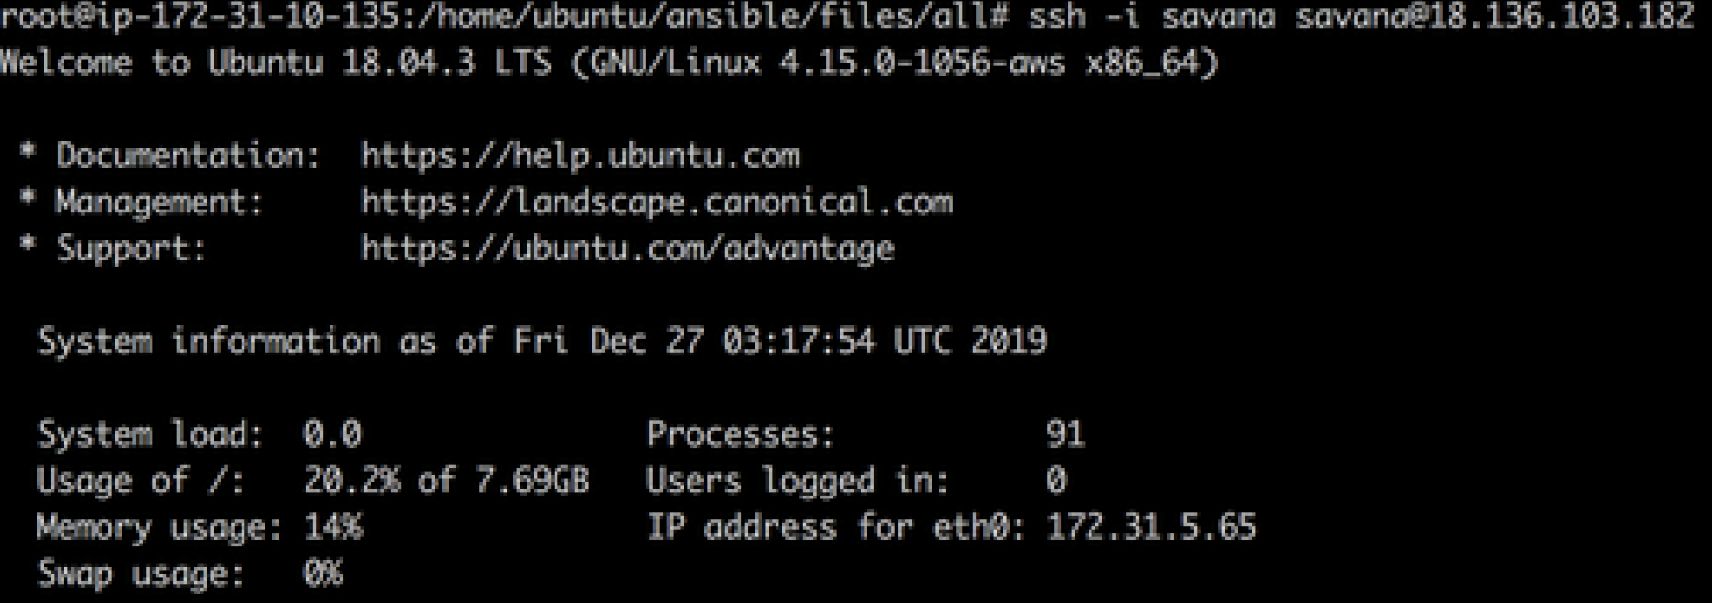
Now, we can do SSH to target host with our new registered user to verify it.
Let’s try one of the user, savana!
$ ssh -i privatekey user@target
To
$ ssh -i savana savana@18.136.103.182
It’s the centos instance as target.

It shows that we are successfully SSH to the instance.
Reference
- Lesmono, R. 2018. AWS Dynamic Inventory and Ansible: Thank God I Can Sleep More. https://medium.com/happy5/aws-dynamic-inventory-and-ansible-thank-god-i-can-sleep-more-4d2aeadbc6f

