
One of the basic product from Alibaba Cloud is Object Storage Services (OSS). OSS is a secure, cost-effective, and high-durability cloud storage service which provided by Alibaba Cloud. It provide 99.9999999999% for data durability and 99.995% for service availability.
You can call API operation by using SDKs or other tools to maintain your data to connect with OSS. It can be used to store image, audio, video objects, and static website file like html, js, css. The OSS itself has several types of storage classes which can be used according to your needs, there are Infrequent Access (IA), Archive, and Cold Archive.
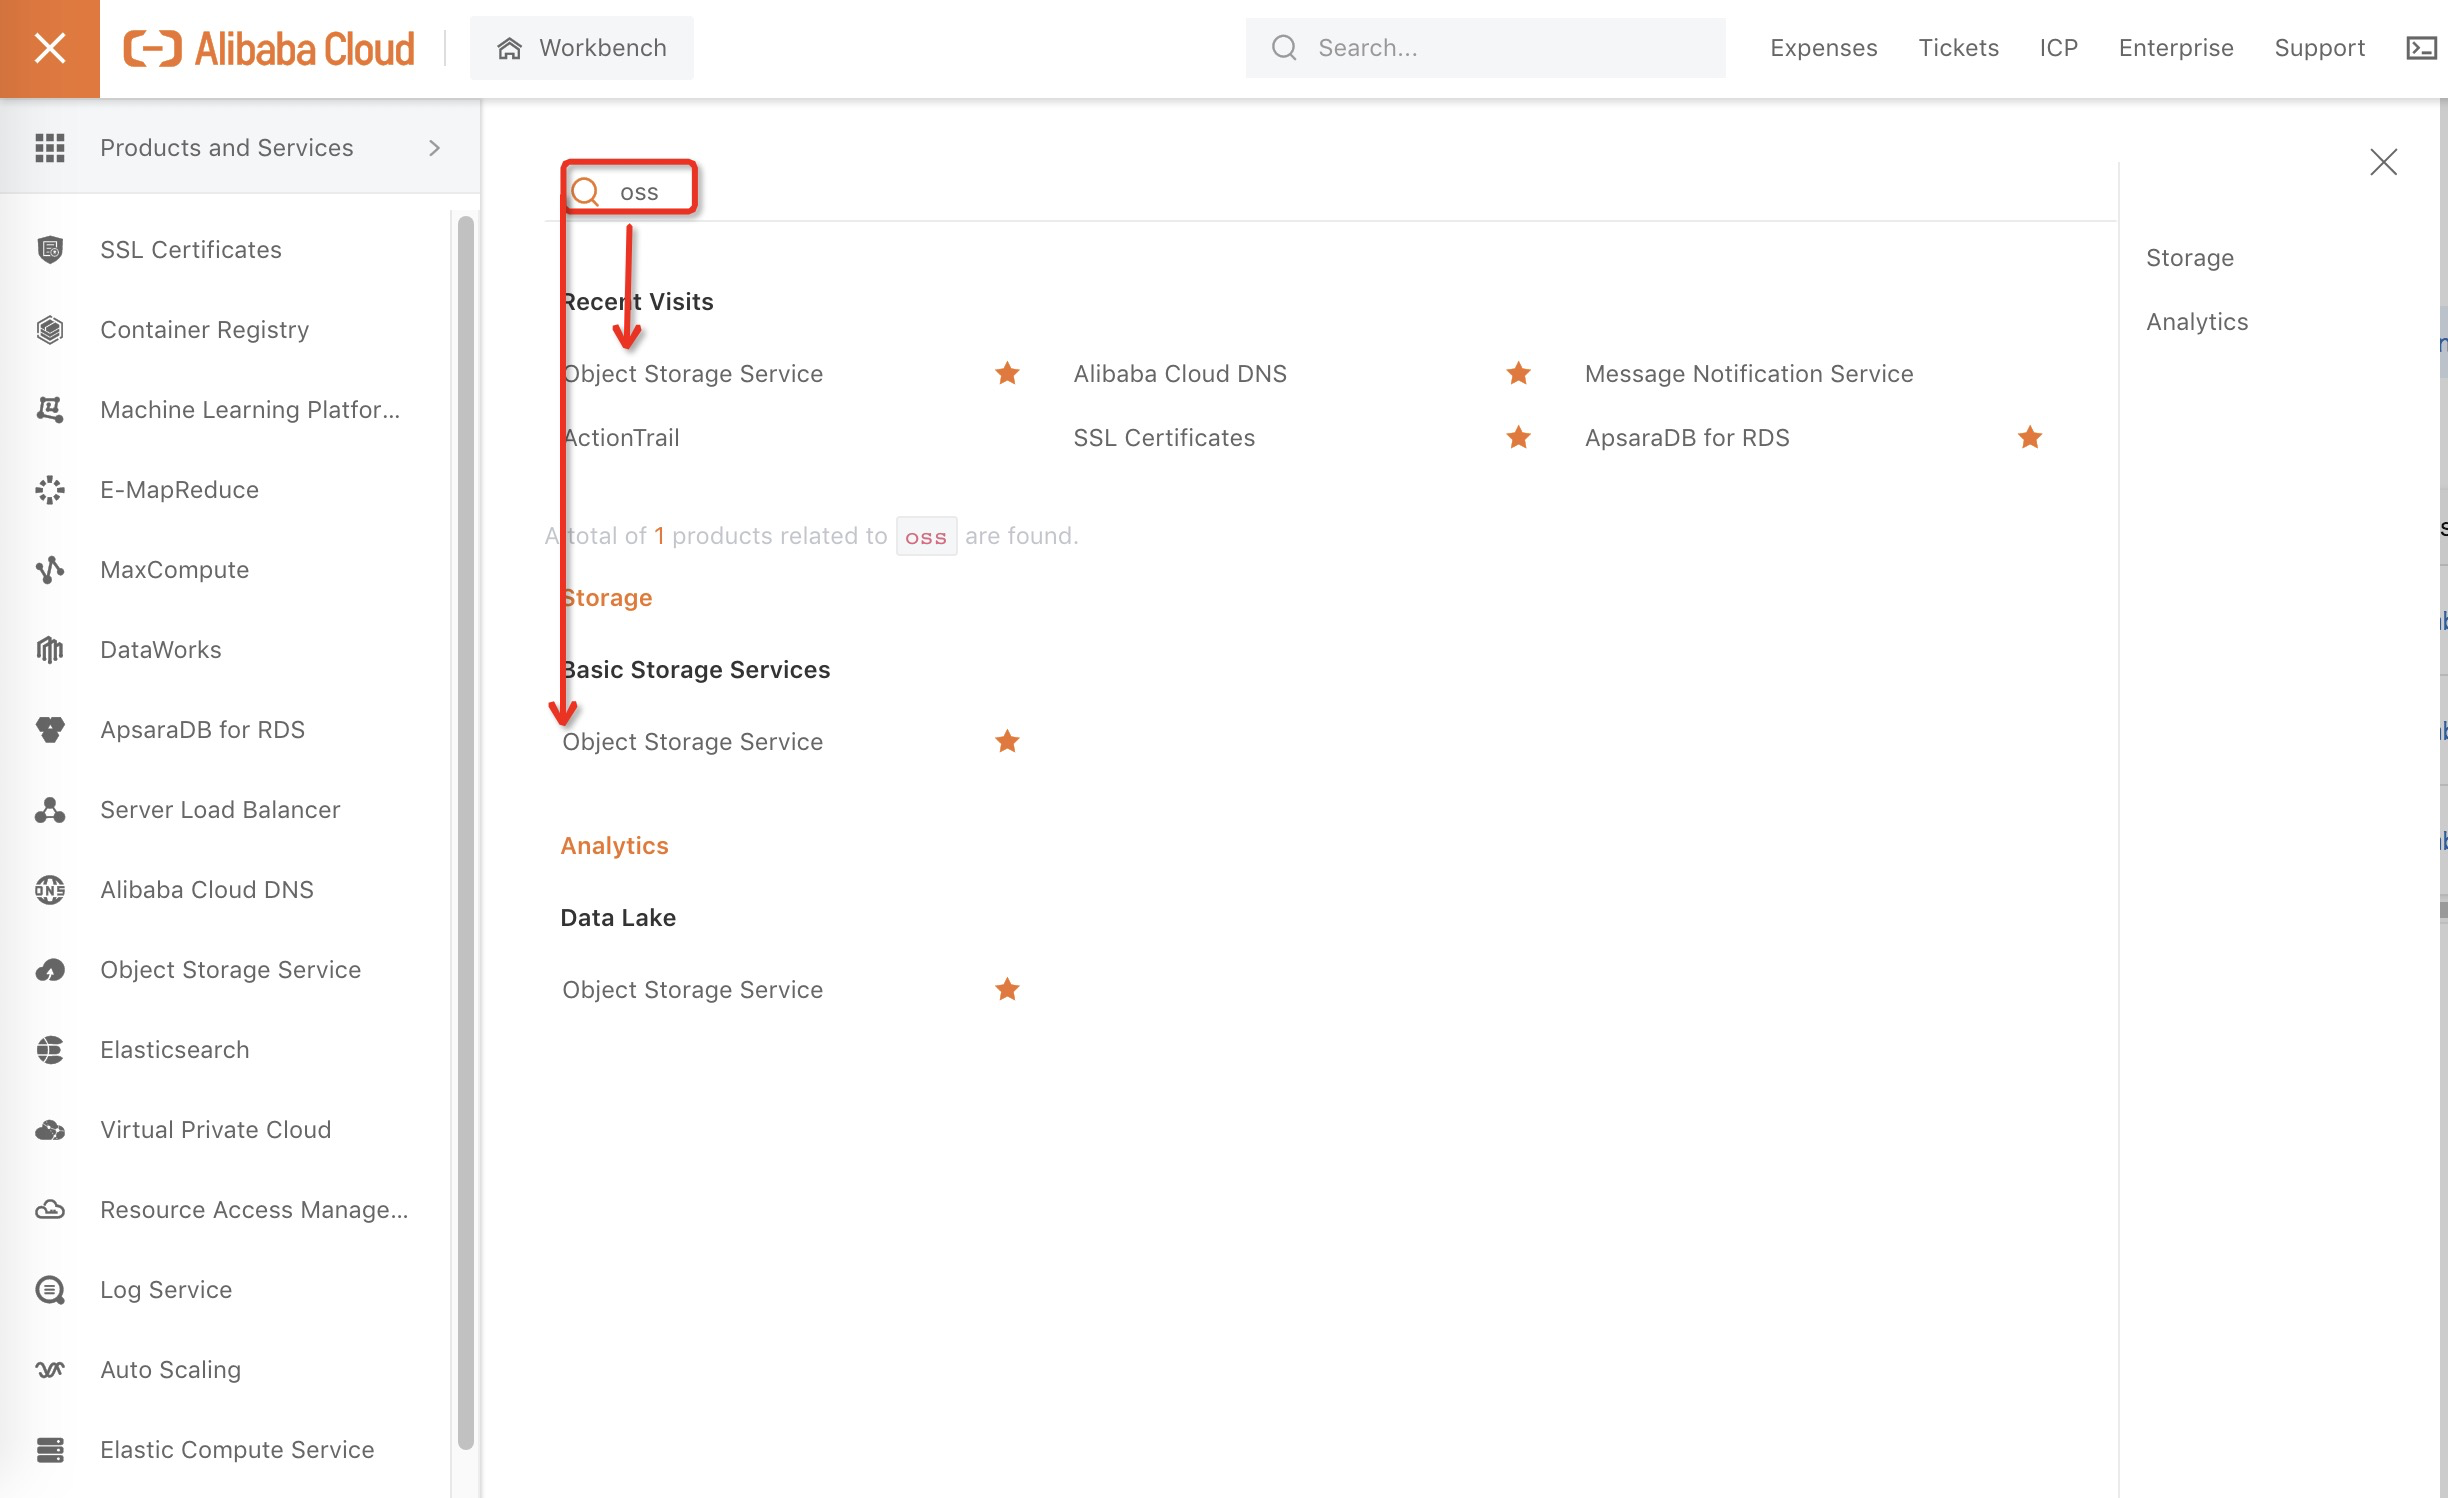
How to basic?! How to create the bucket?
It’s pretty simple. Just go to ‘Products and Services’ and search for OSS/Object Storage Services then choose.
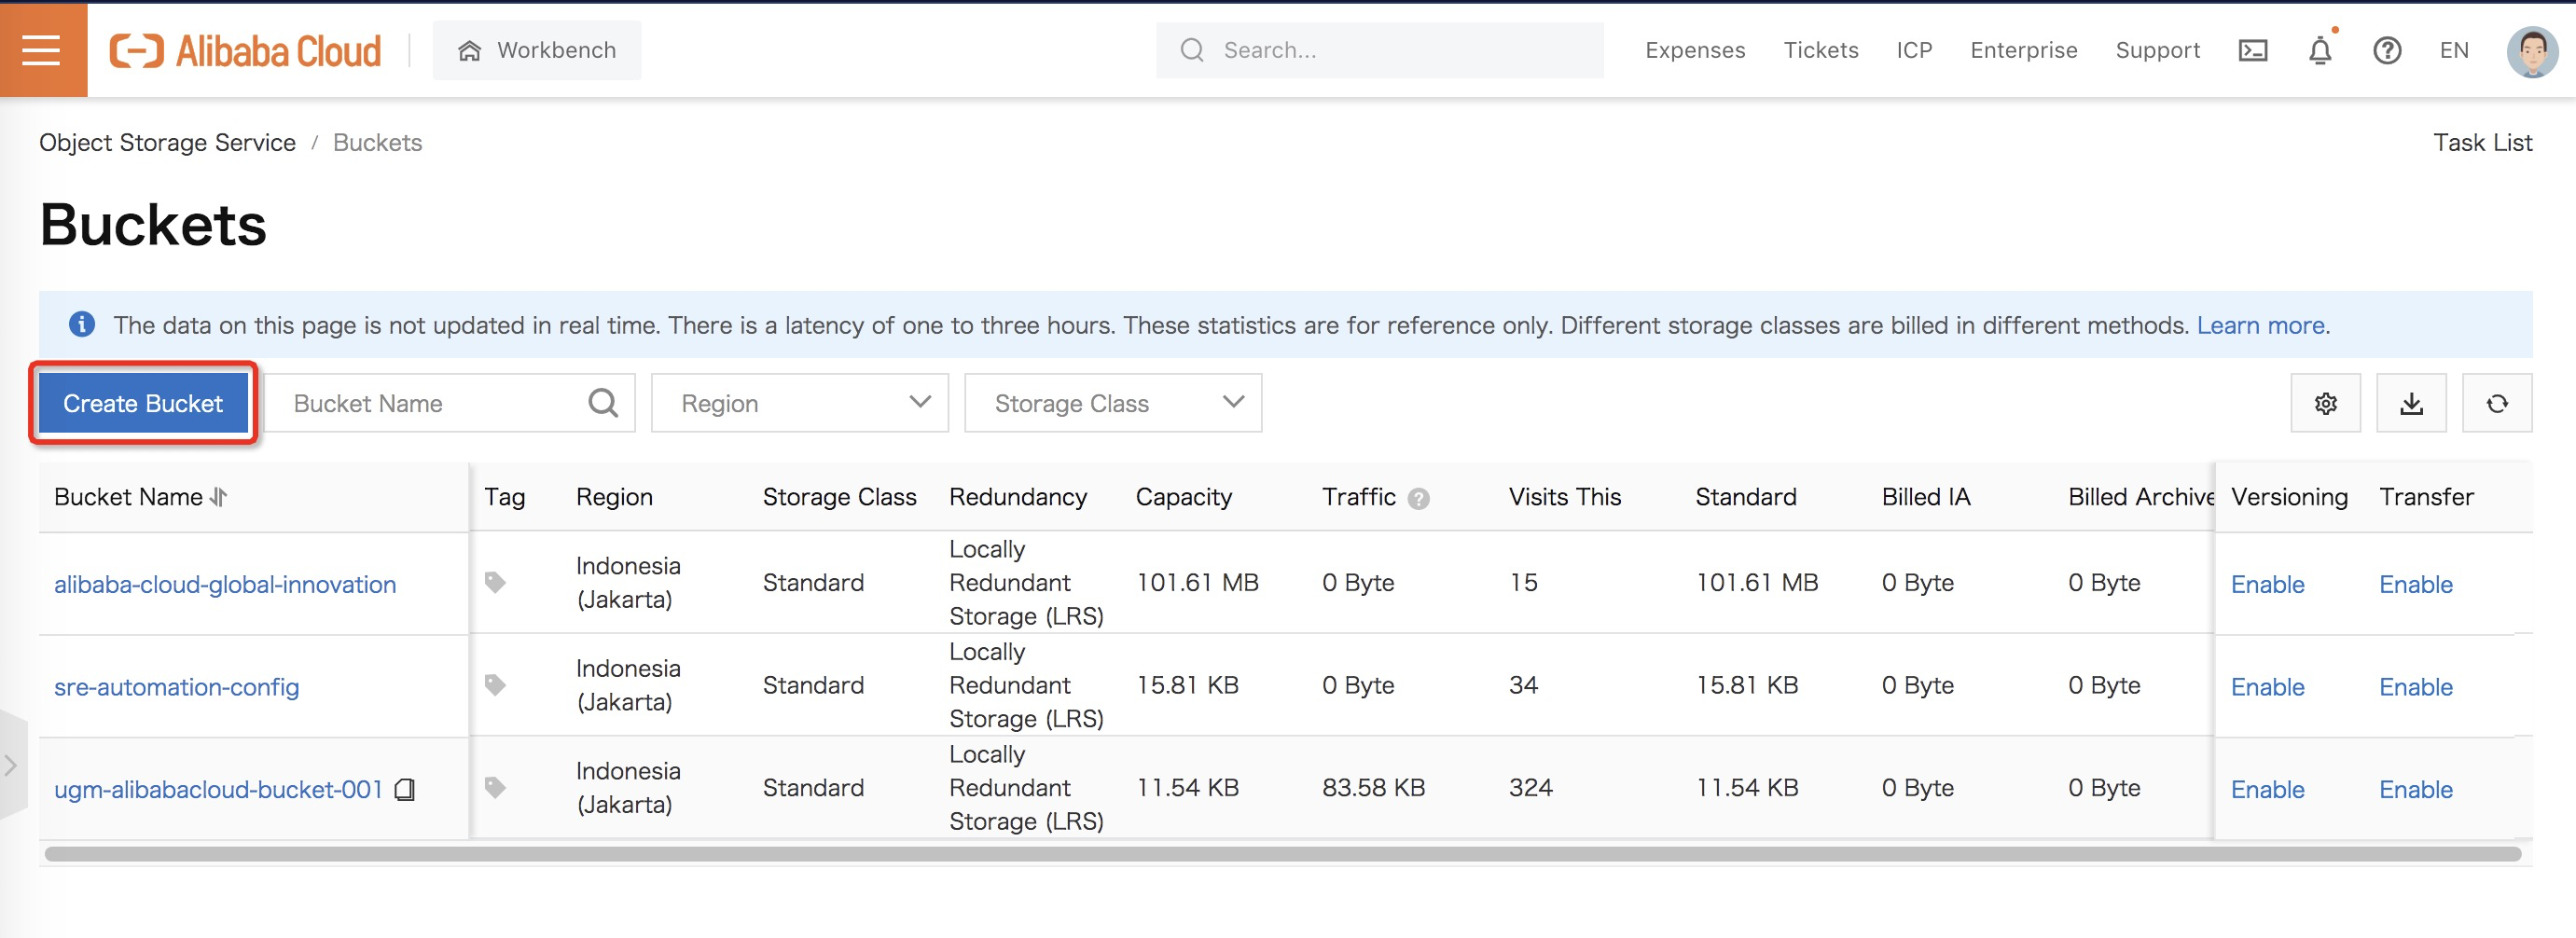
You can see that i have created 3 buckets. To create another new bucket, just choose ‘Create Bucket’.
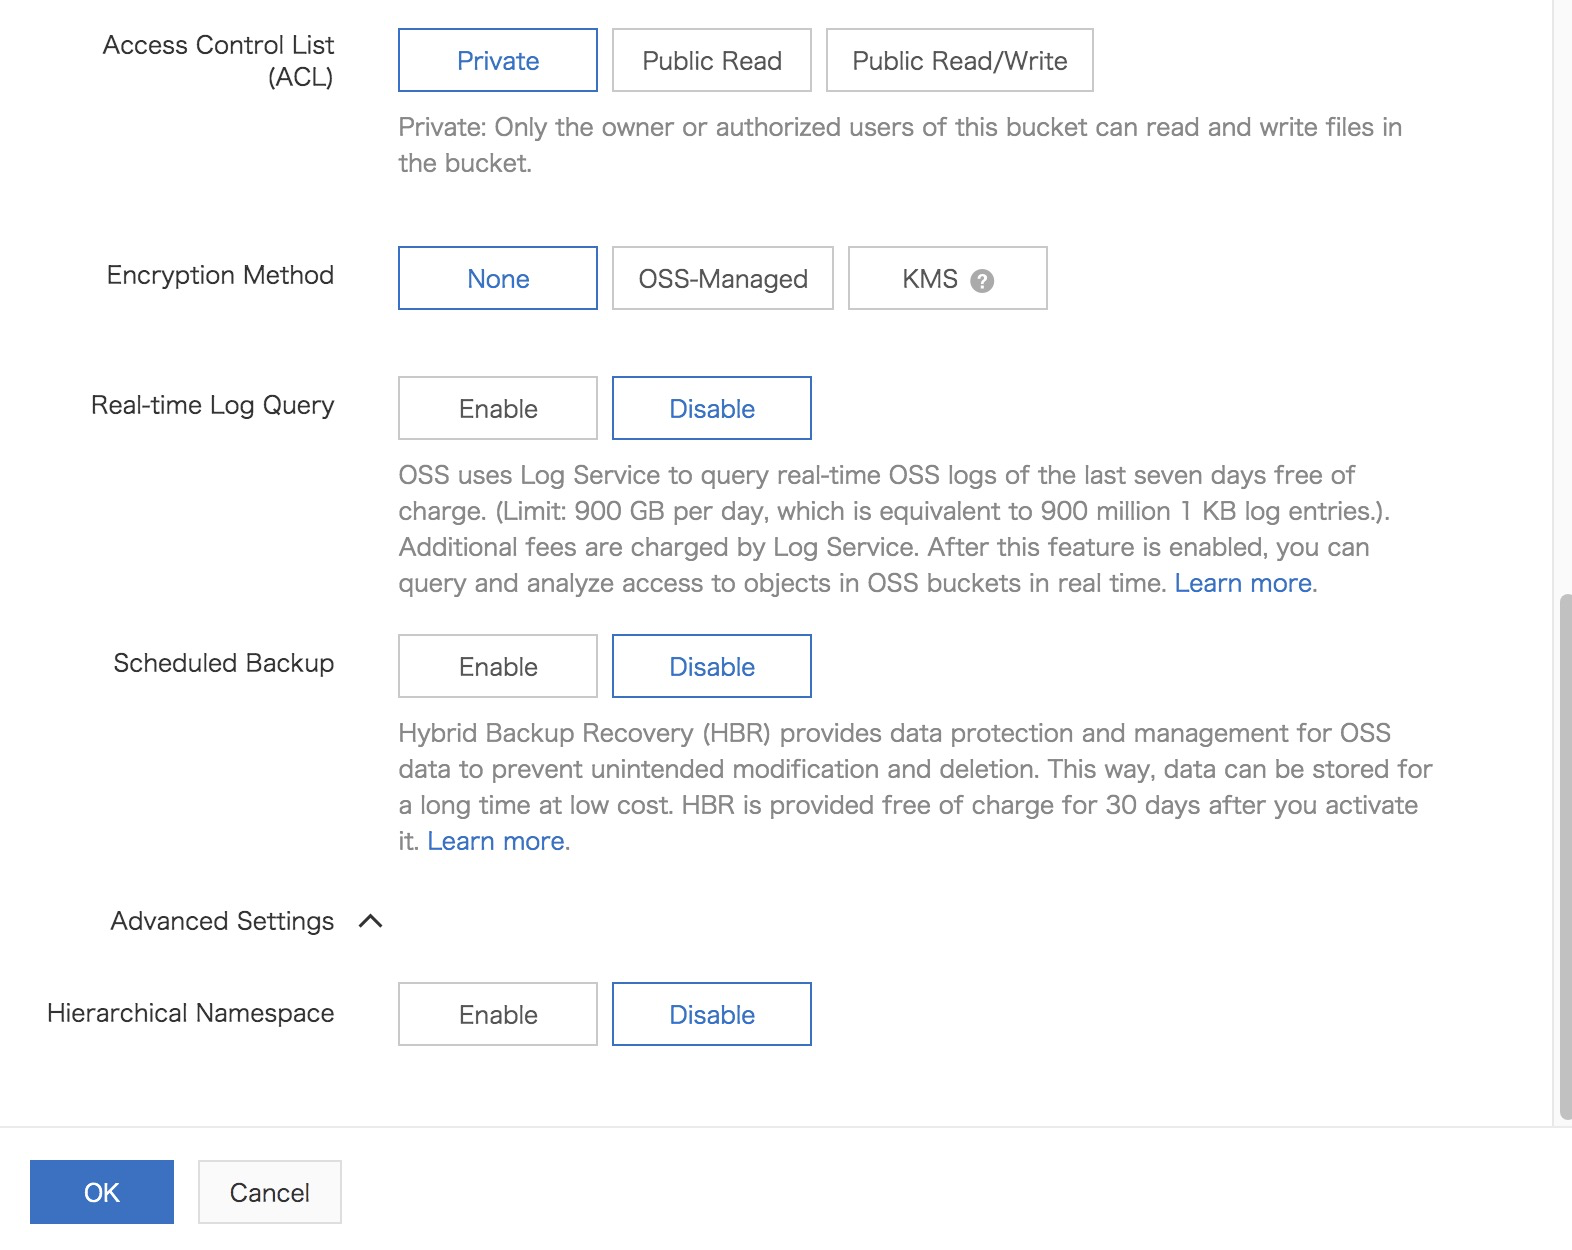
When you’re creating bucket, you’ll find these mandatory parameters to fill.
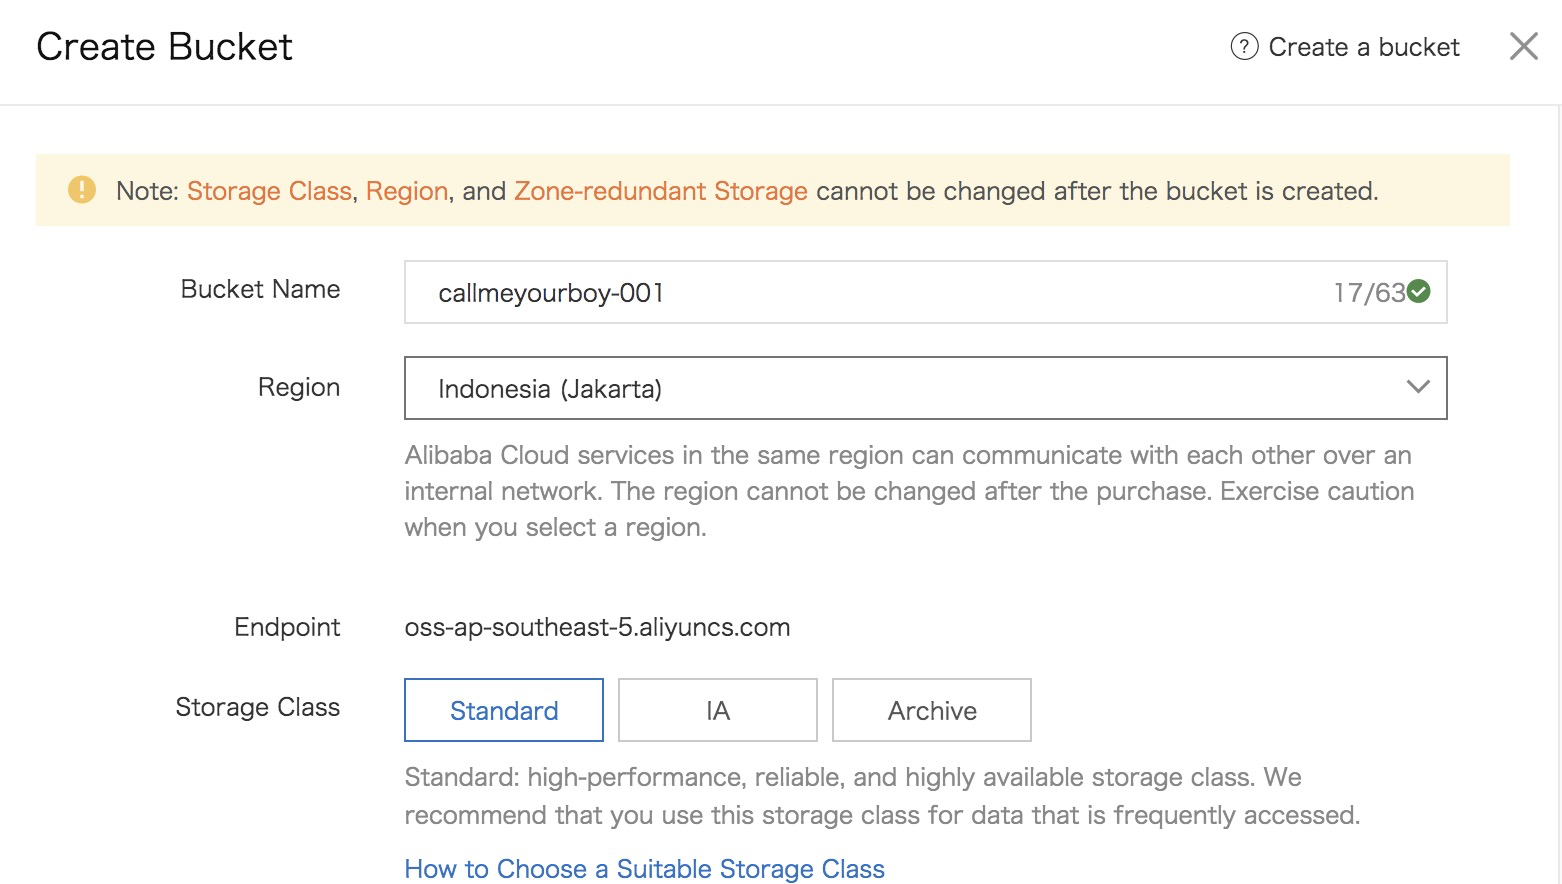
For ‘Bucket Name‘, you need to define it unique globally. Maybe you can combine the name with number to make it more unique.
‘Region‘, you can choose according to your region or your needs. The ‘Endpoint‘ will follow the region you choose.
‘Storage Class‘, choose it depends on your needs, and how frequent you access the data inside storage.
‘Zone-Redundant Storage‘, it makes your storage stronger and more secure, it mostly used to provide disaster recovery center and then increasing the availability of data.
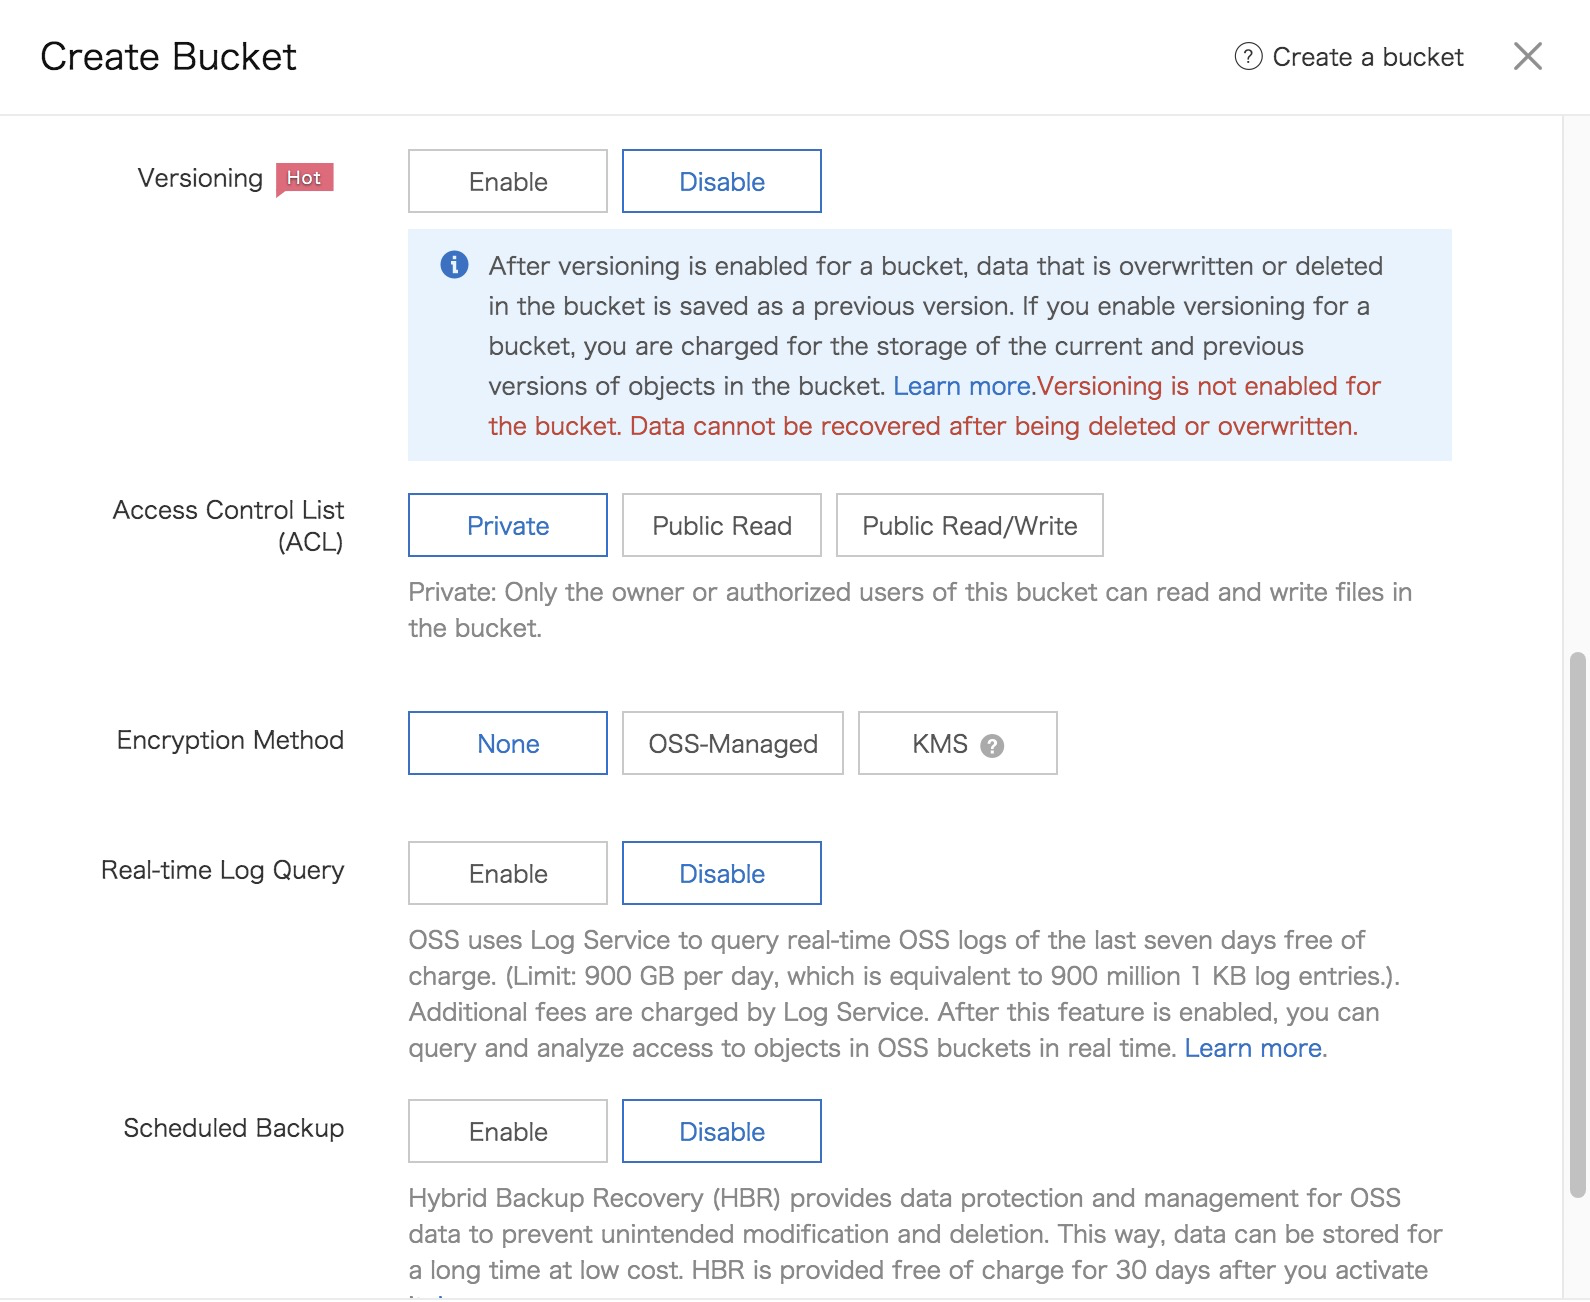
‘Versioning‘, it prevents human error let’s say your partner accidentally overwrite or remove the file without versioning, then the data can’t be recovered.
‘Access Control List‘ will manage permission of bucket, who can access and is it possible to read or write to that bucket.
Many more parameters, you can find the use of each parameter in the official documentation.
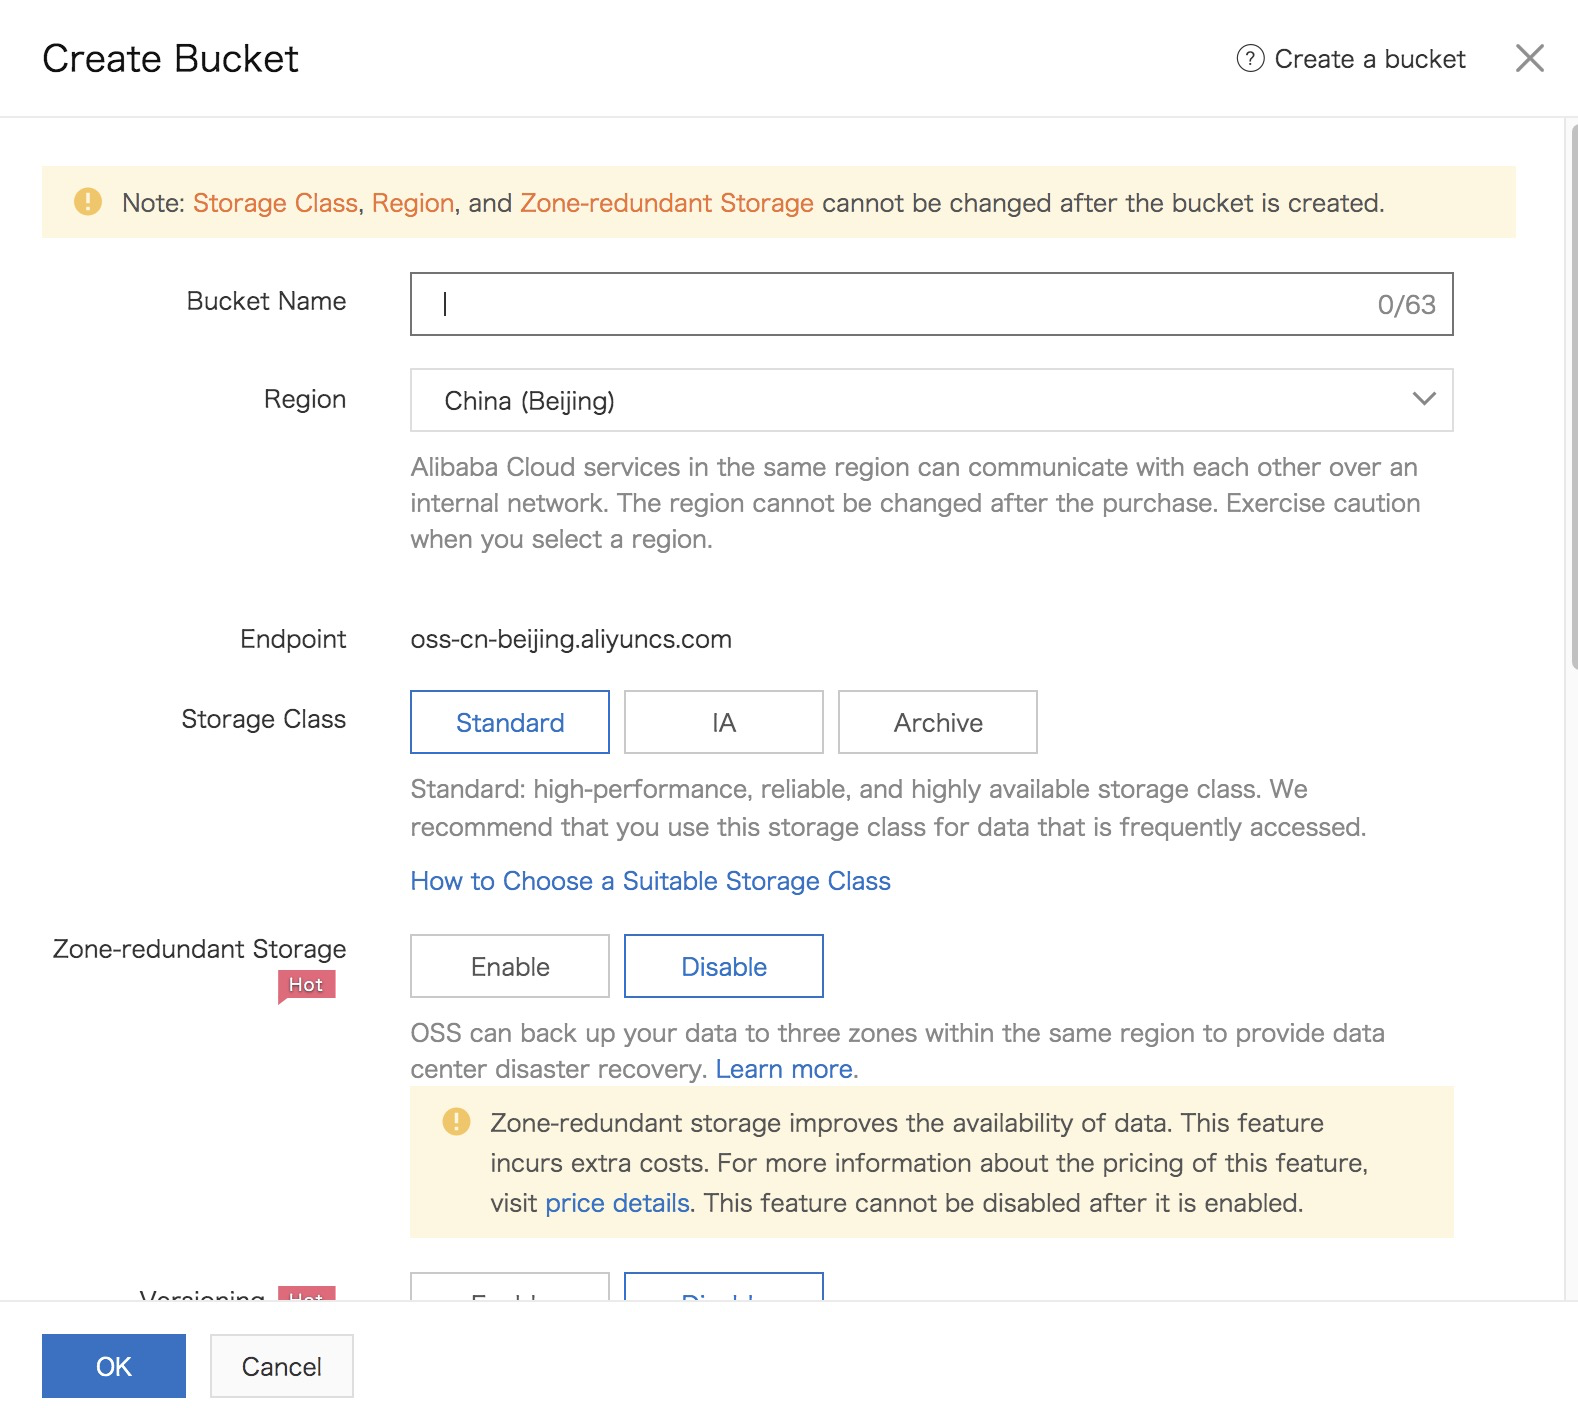
I will create bucket name with name callmeyourboy-001, use the region Indonesia, and use default for other parameters.
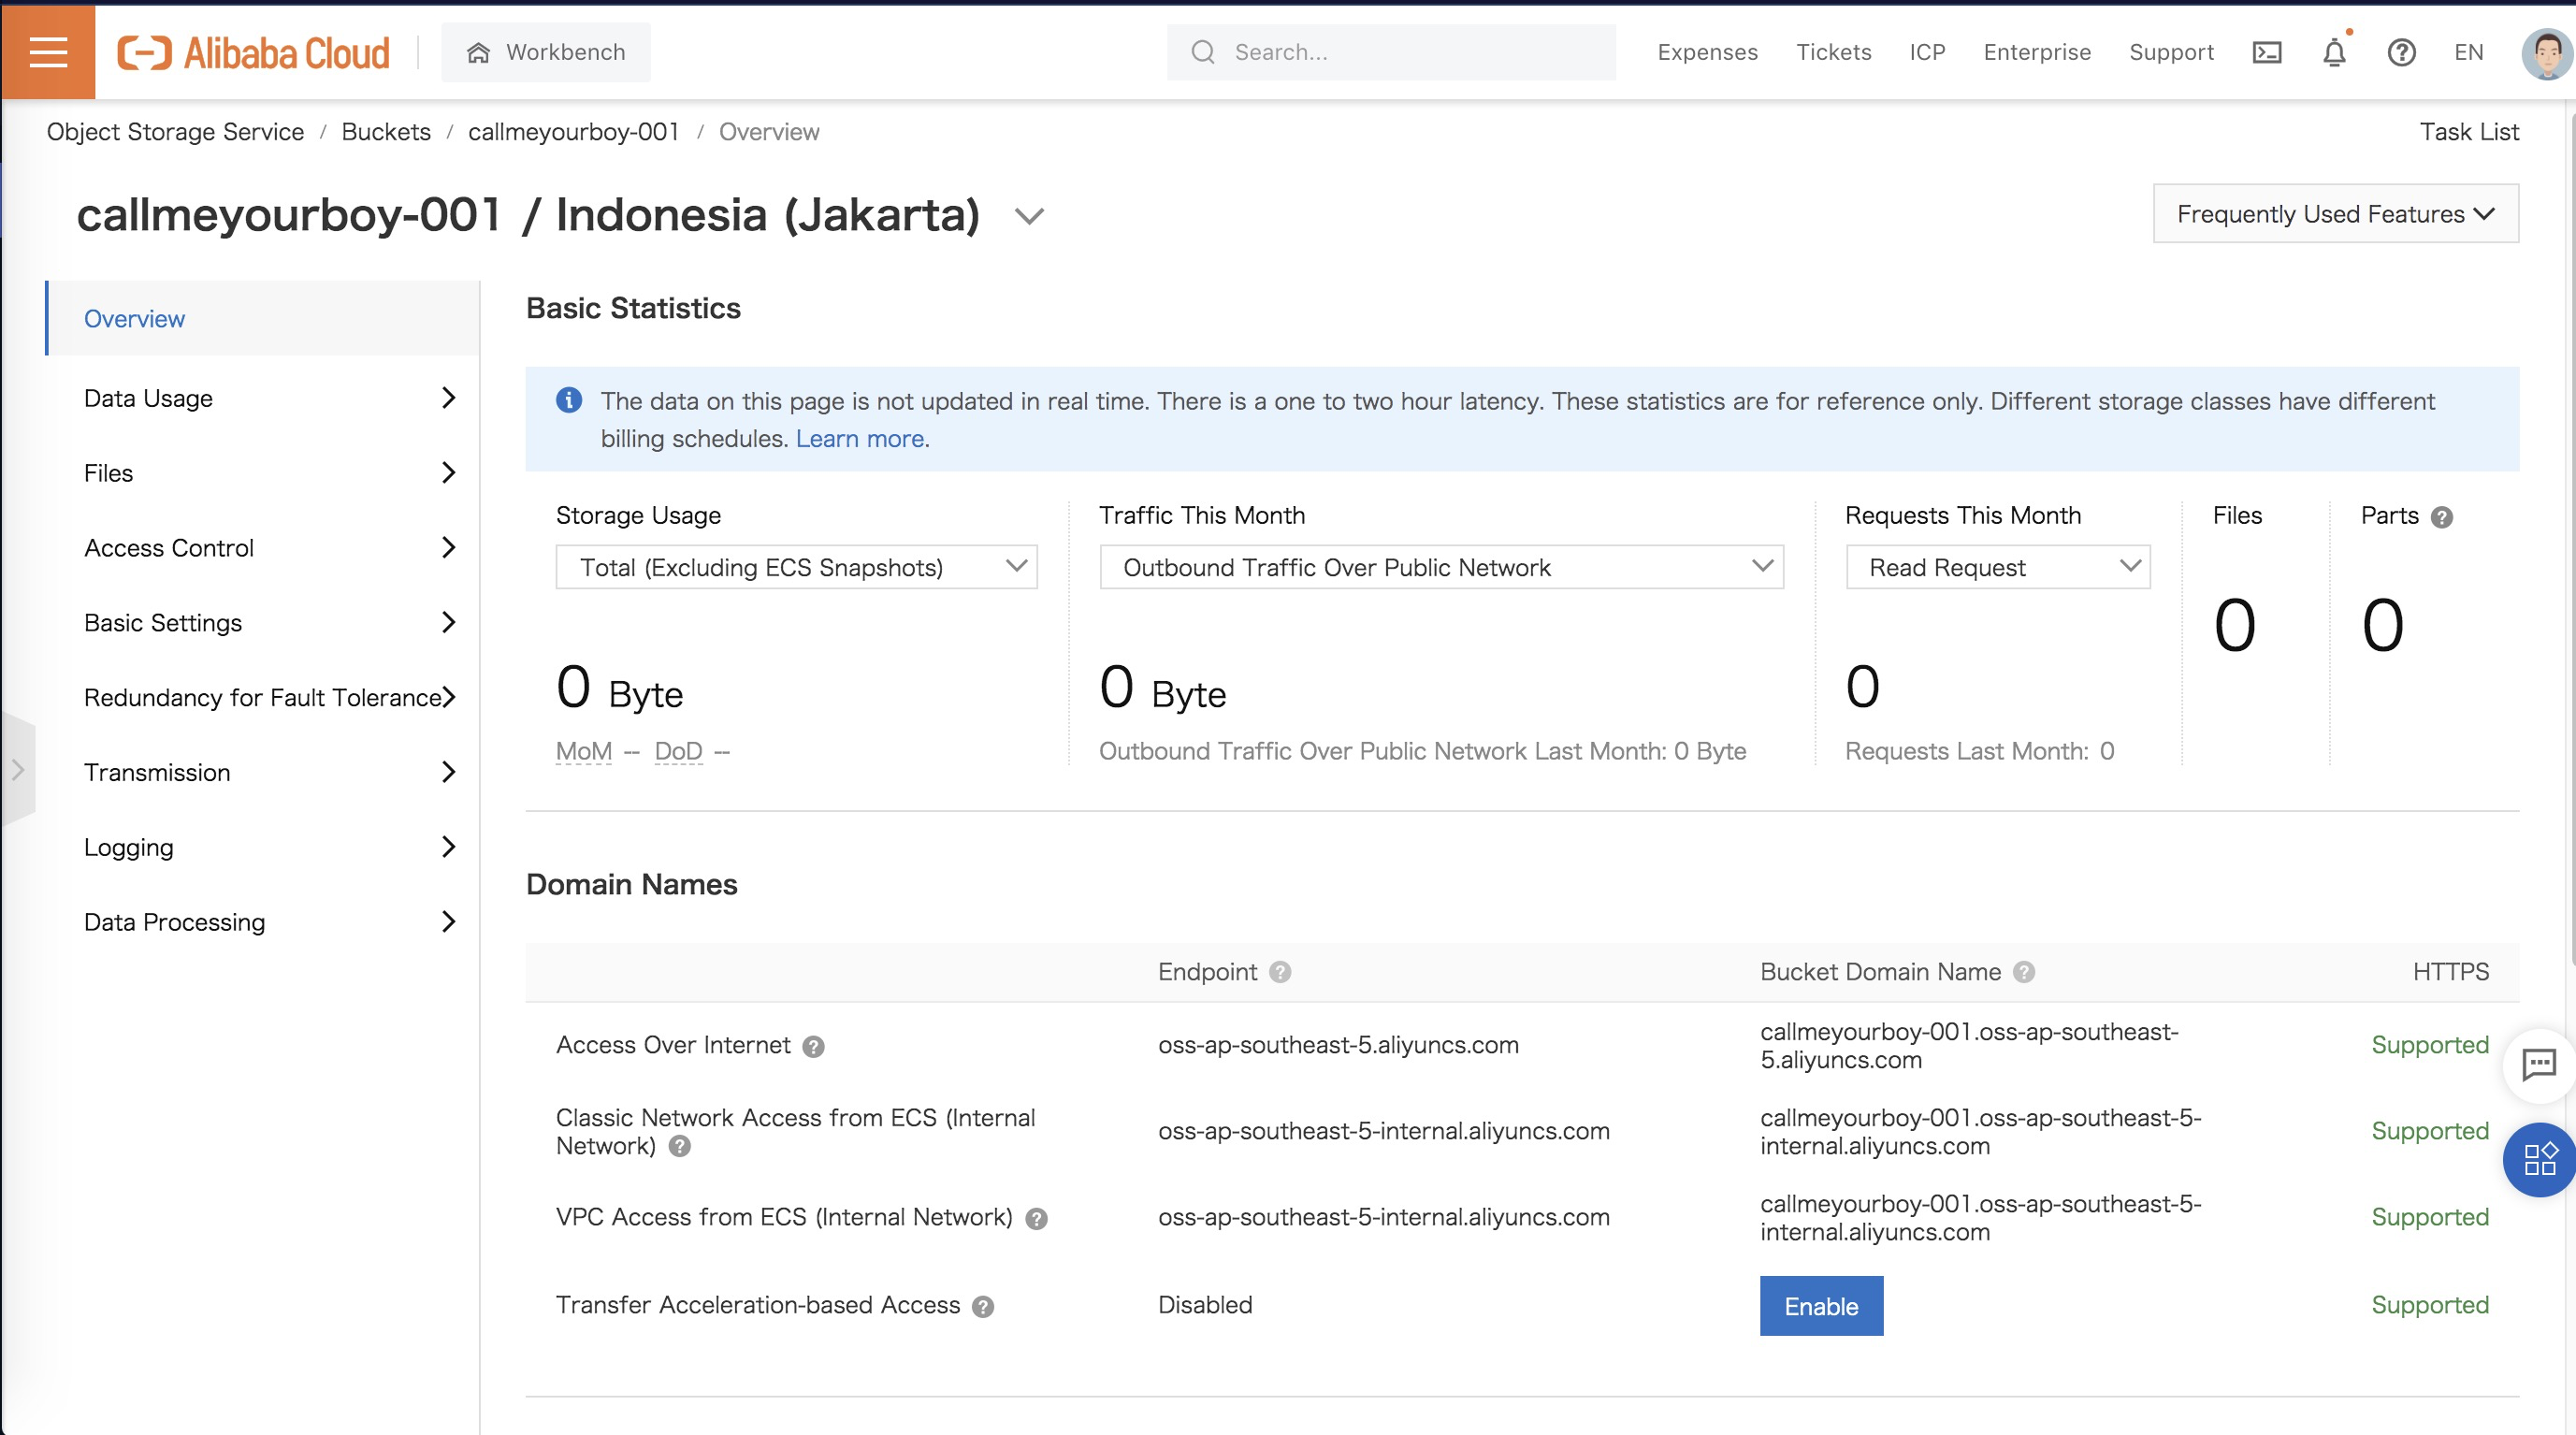
After you create bucket, you can see what your bucket looks like. From Overview, you can access your bucket over internet or if you want to access from internal network (decrease cost for internet), you can find it on Domain Names section.
Then, let’s explore the way to host static website with OSS.
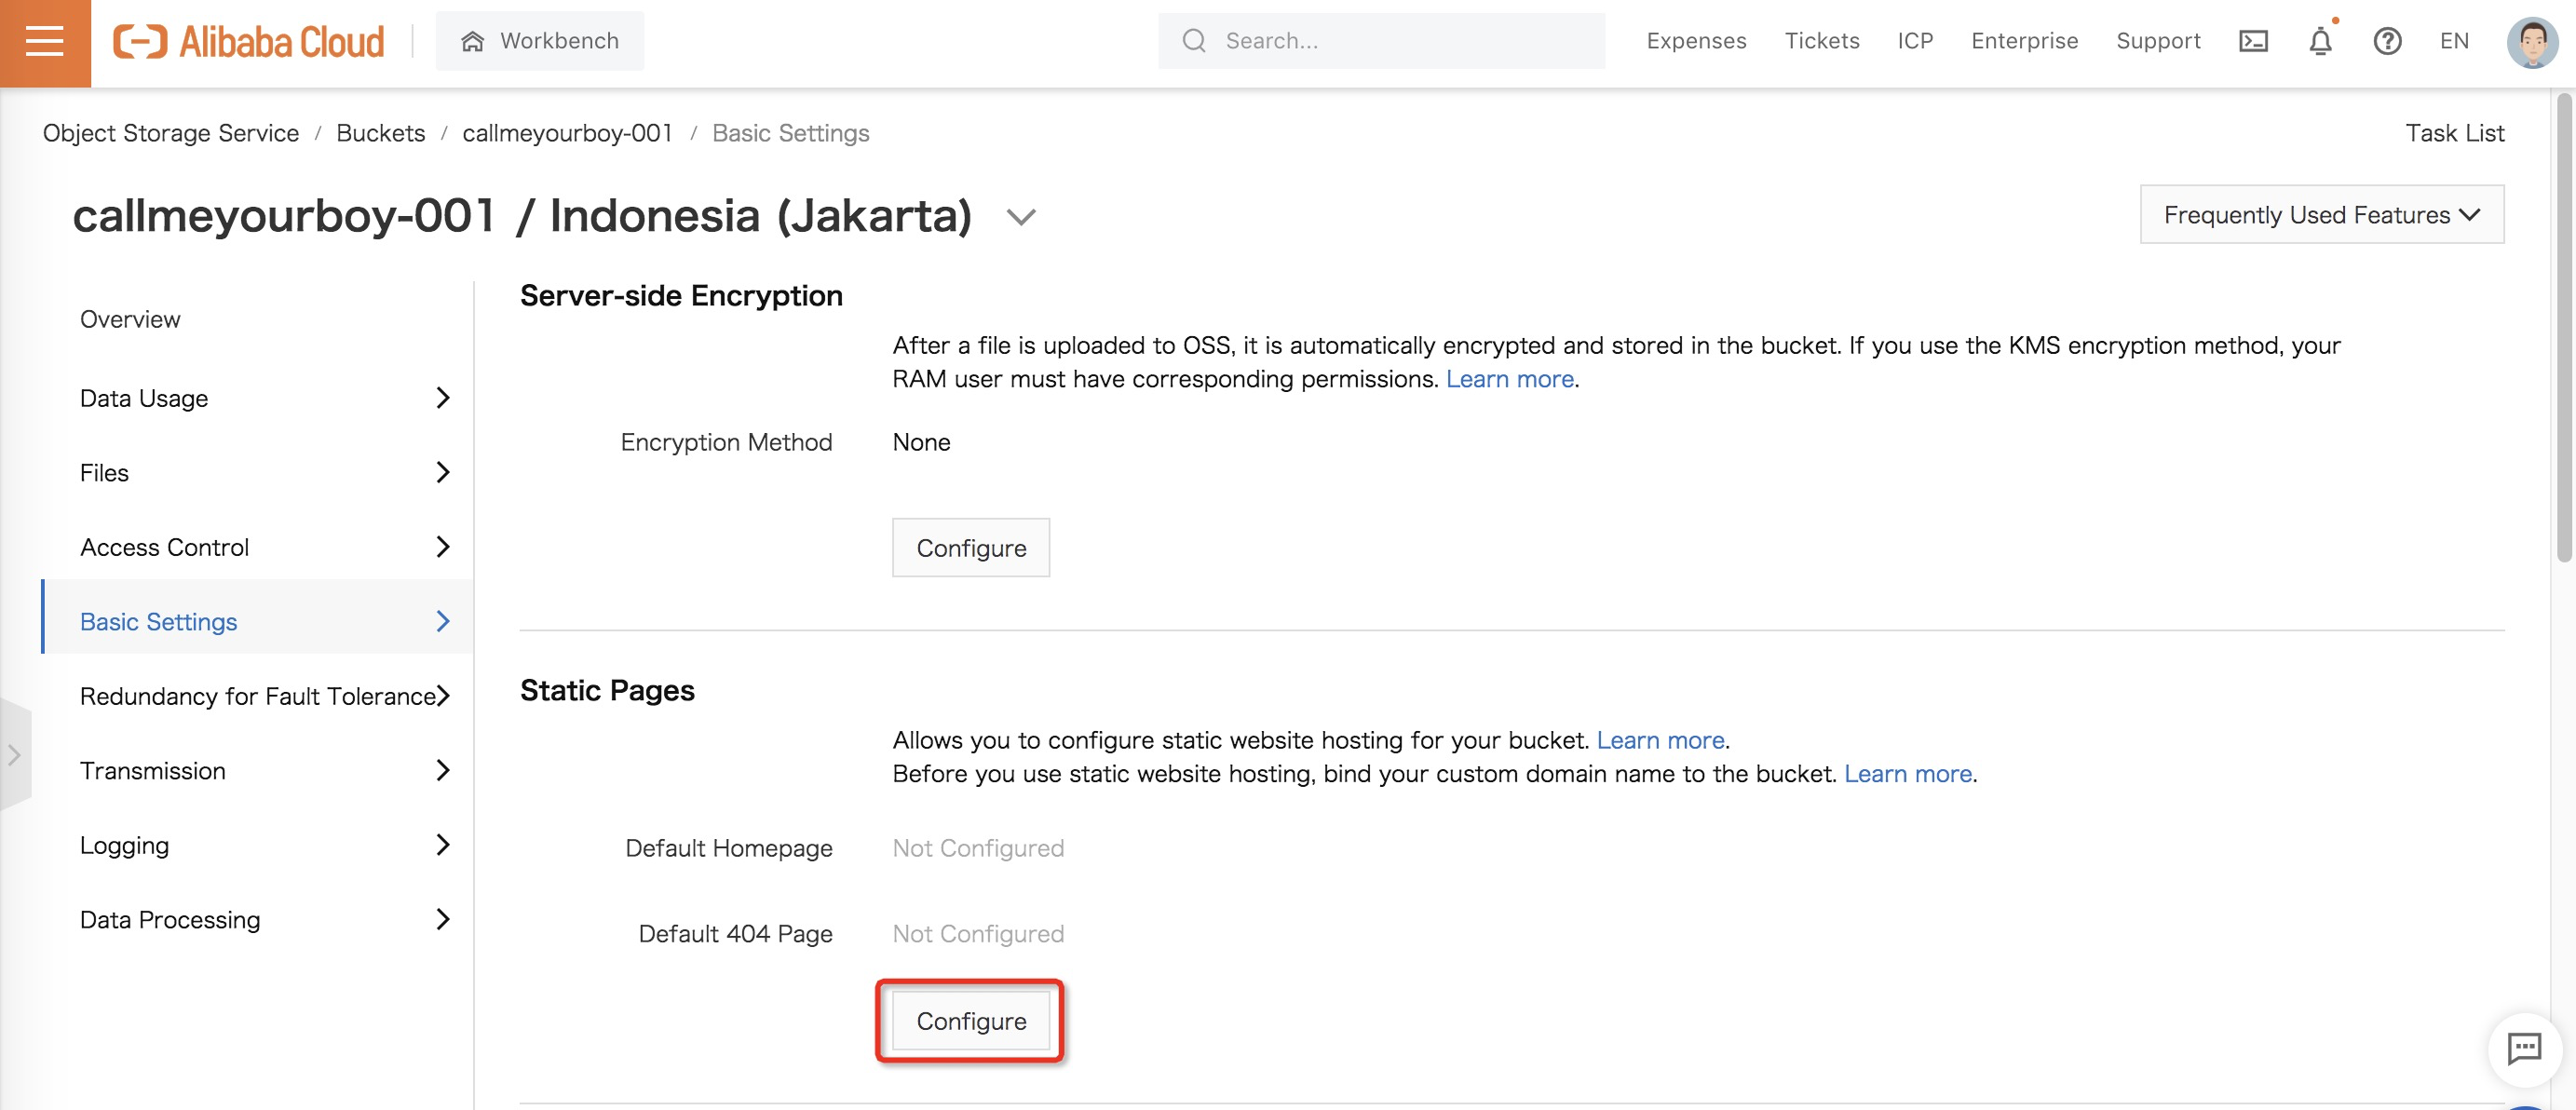
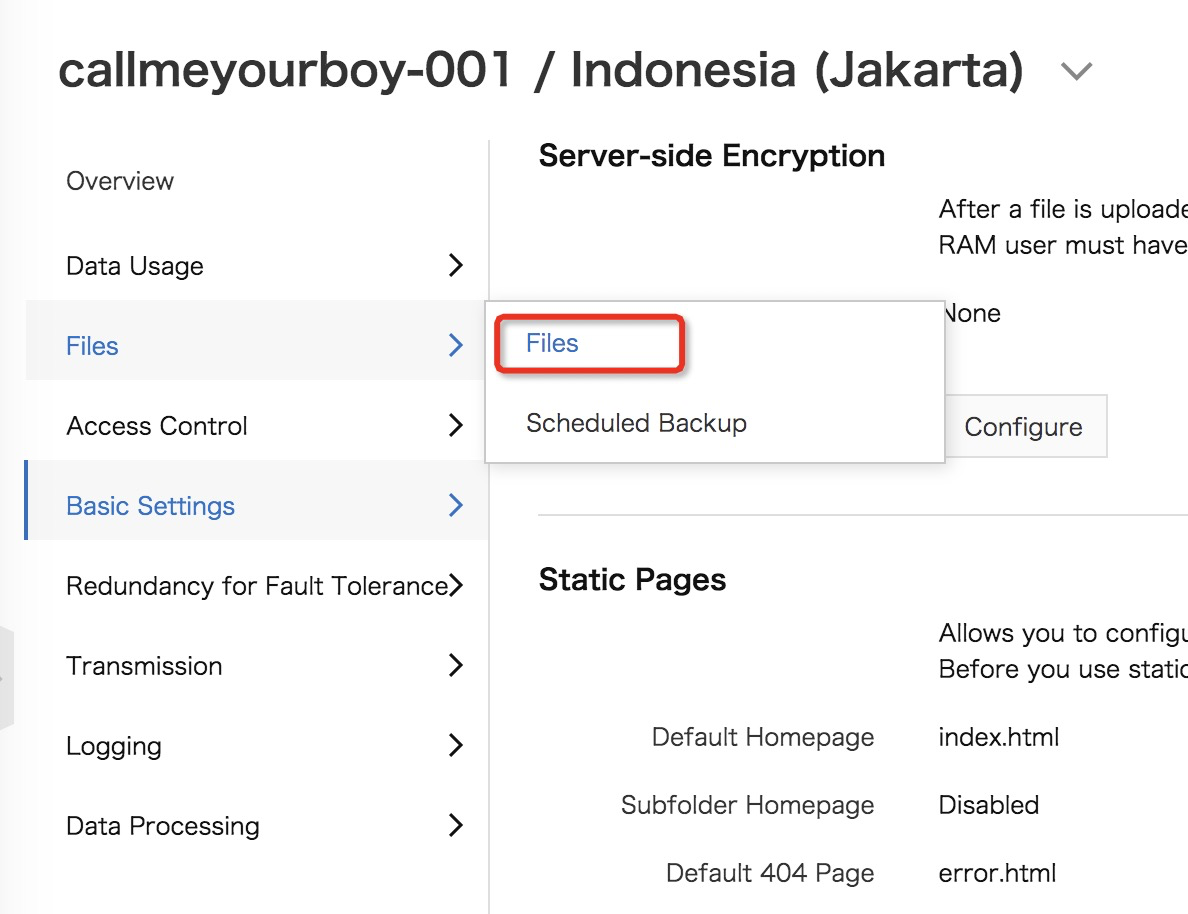
Go to left section and find Basic Settings, hover to it and choose Static Pages.
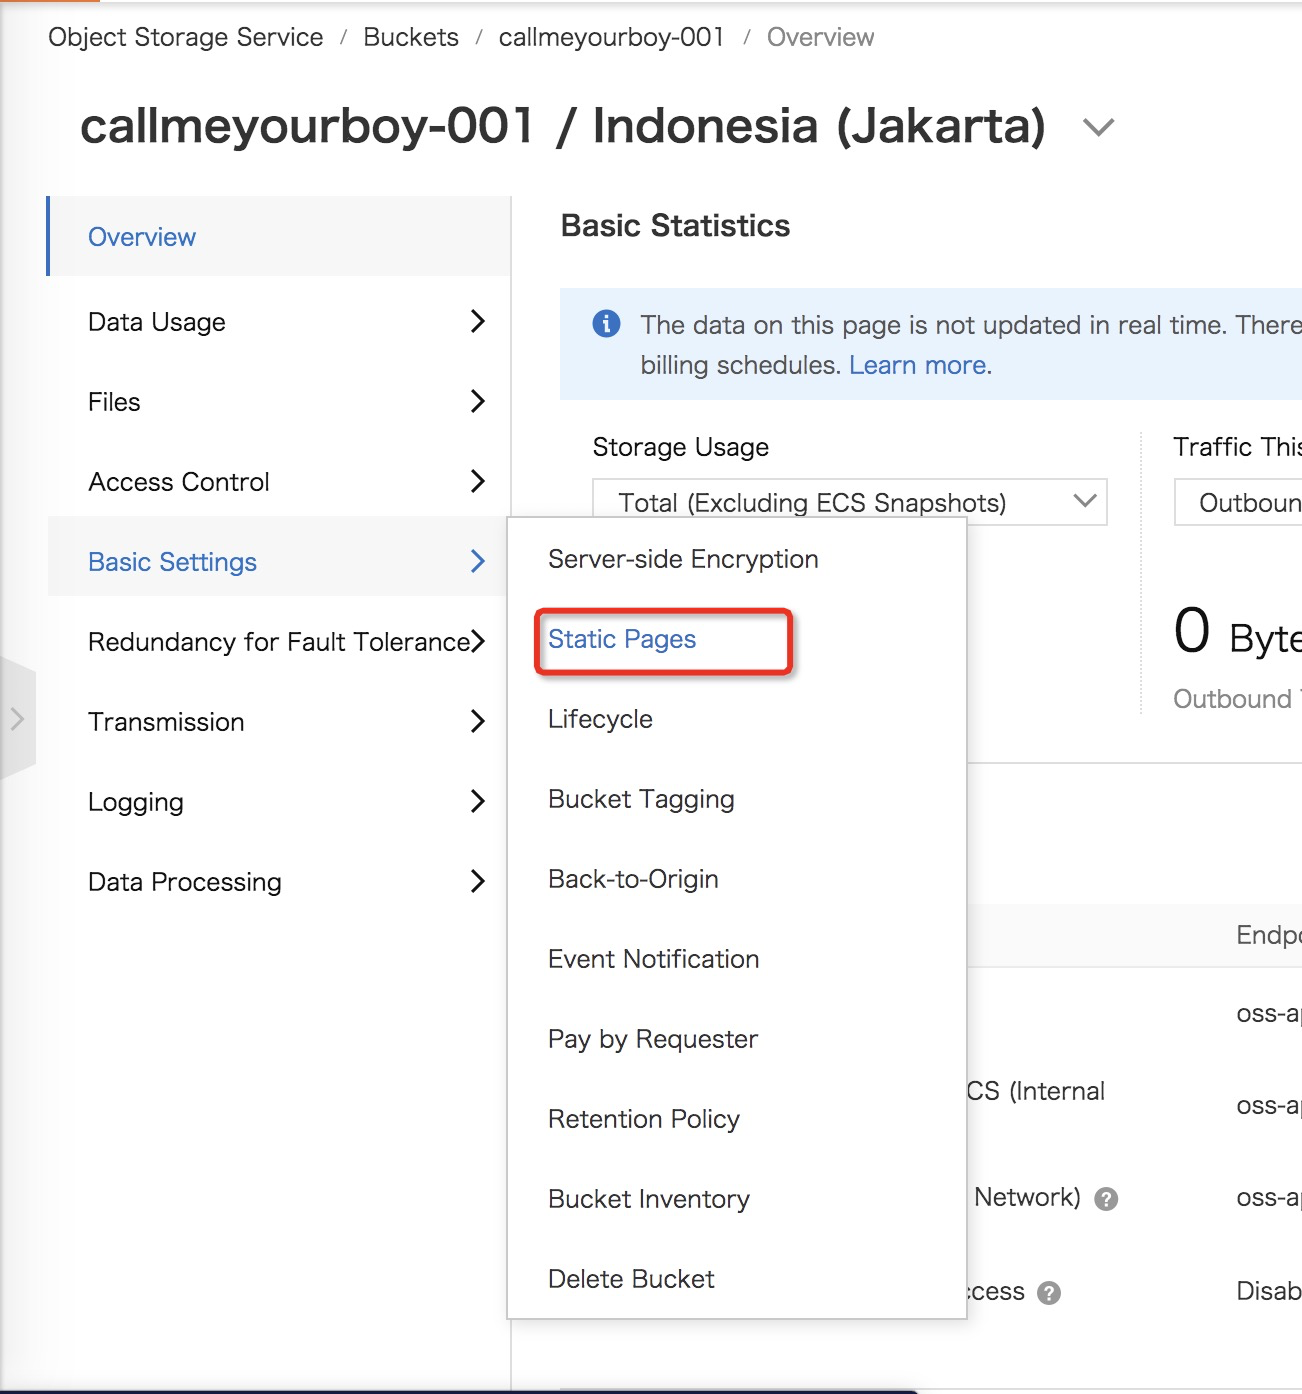
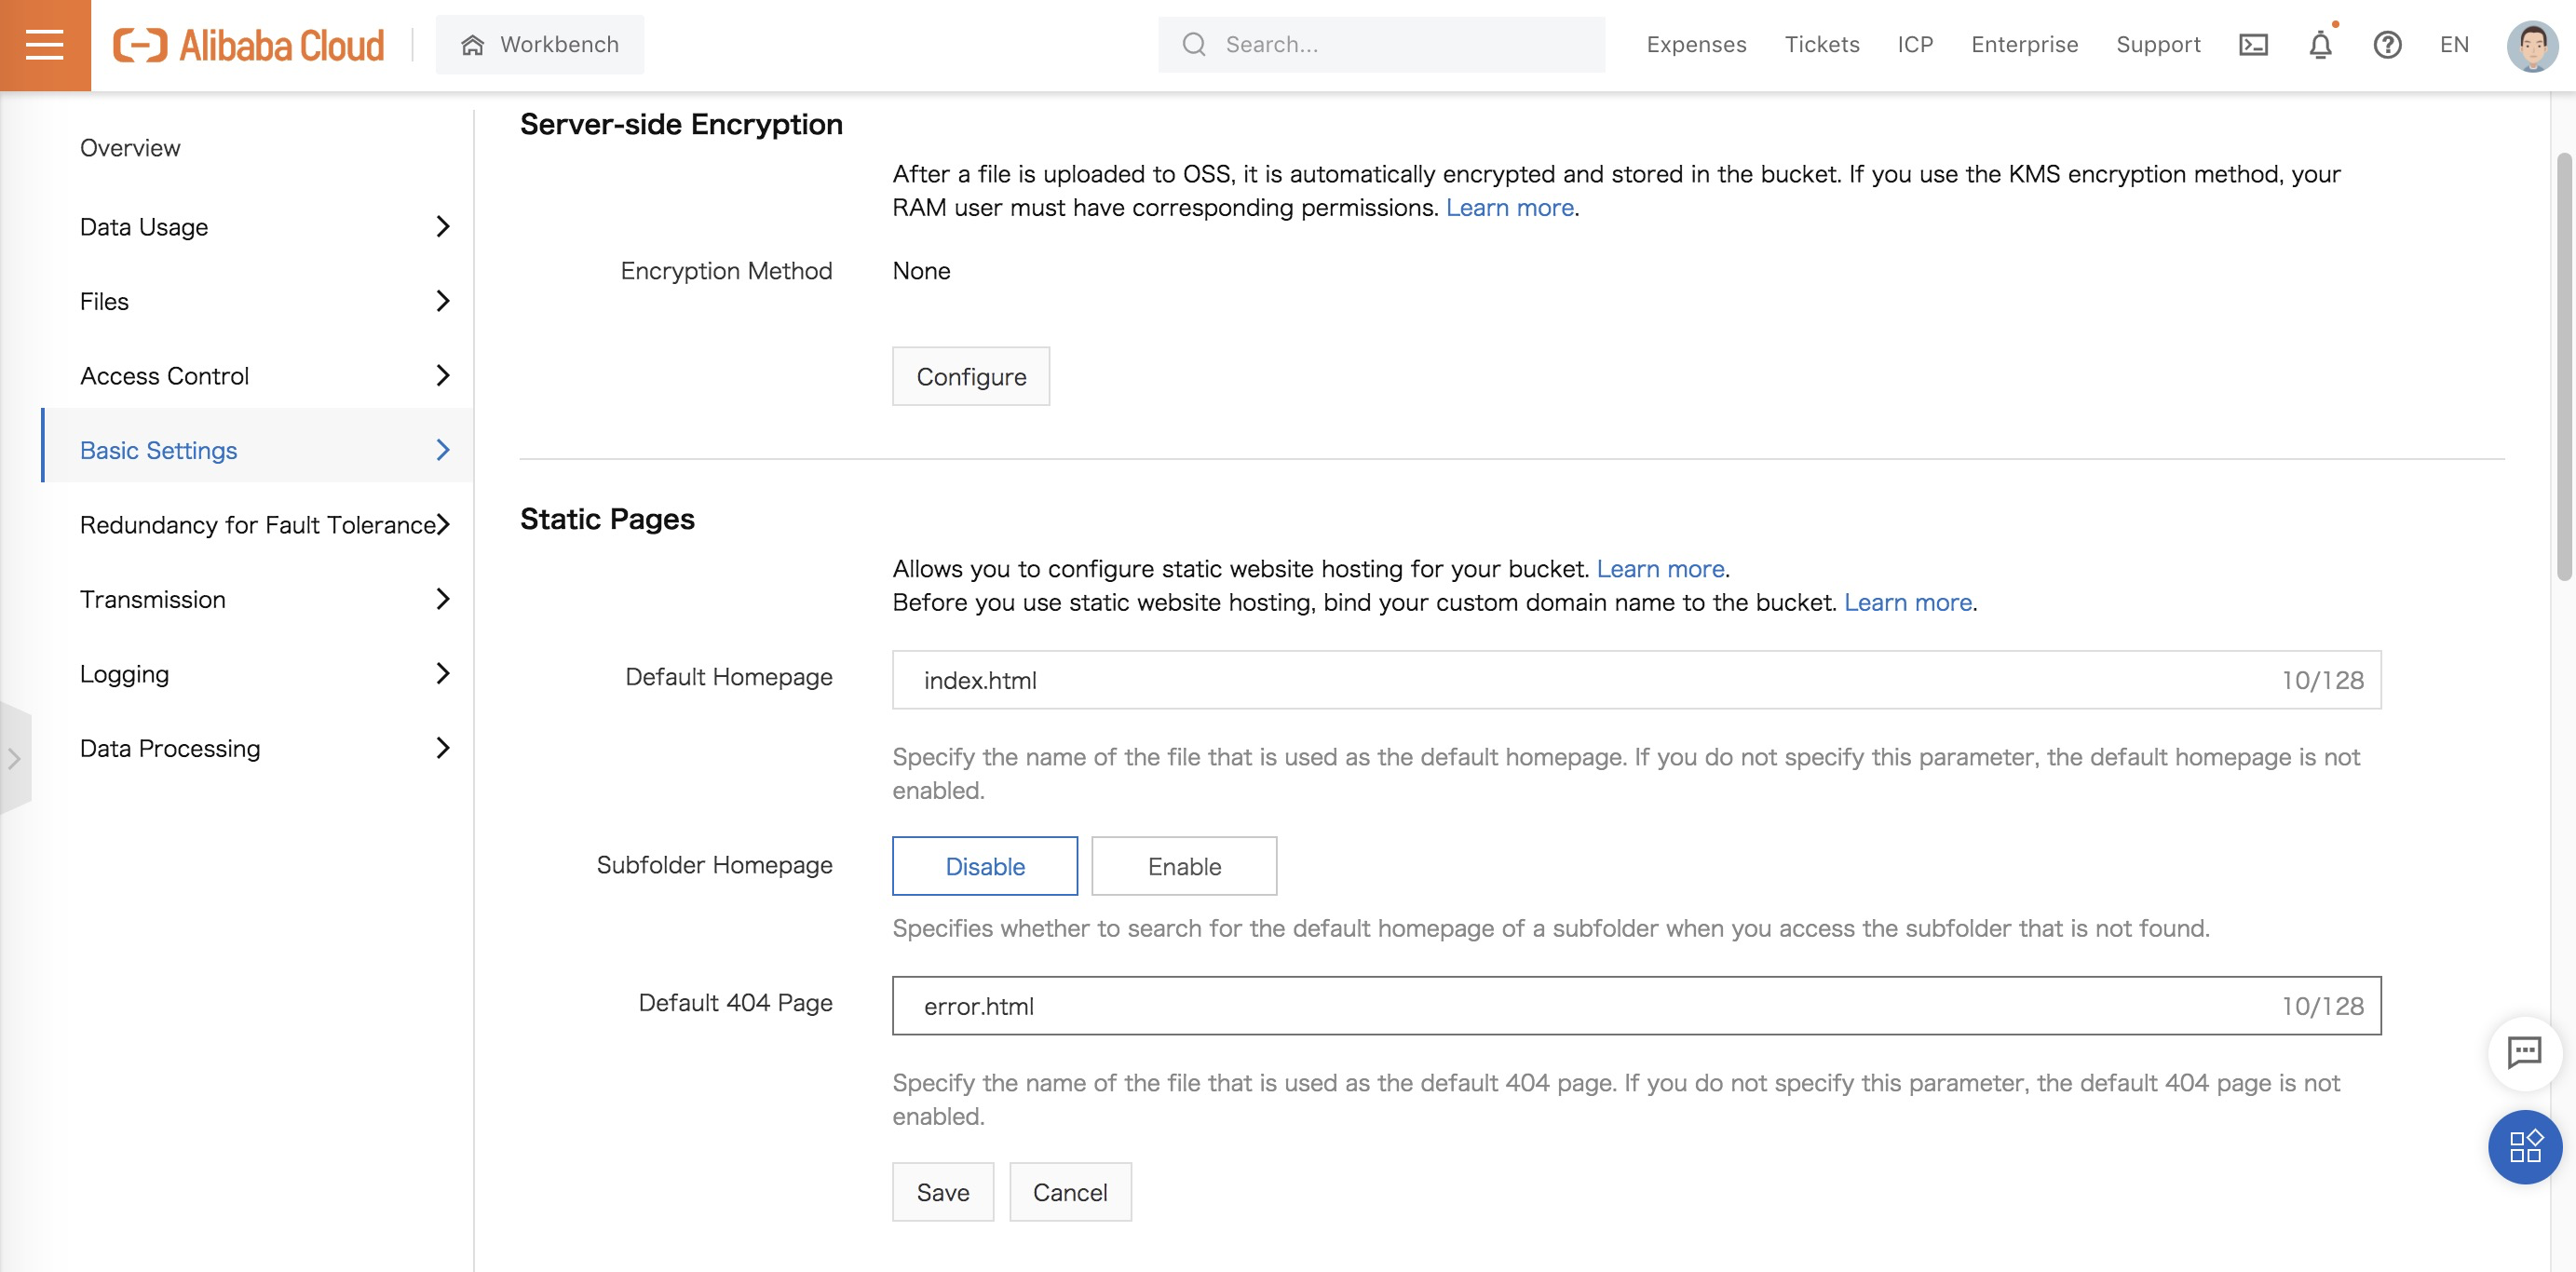
Look into Static Pages, and you see that it has not configured yet. So just click configure and set the default homepage and default 404 page. After that, save it!
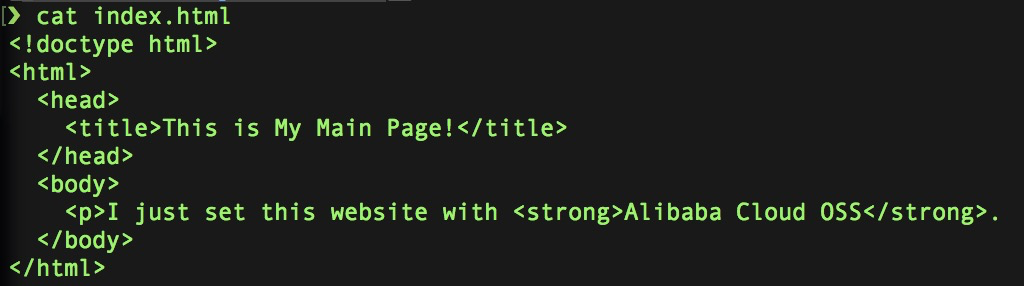
You remember that you don’t have the file yet. Just use the simple script. It’s just simple text in title and body.
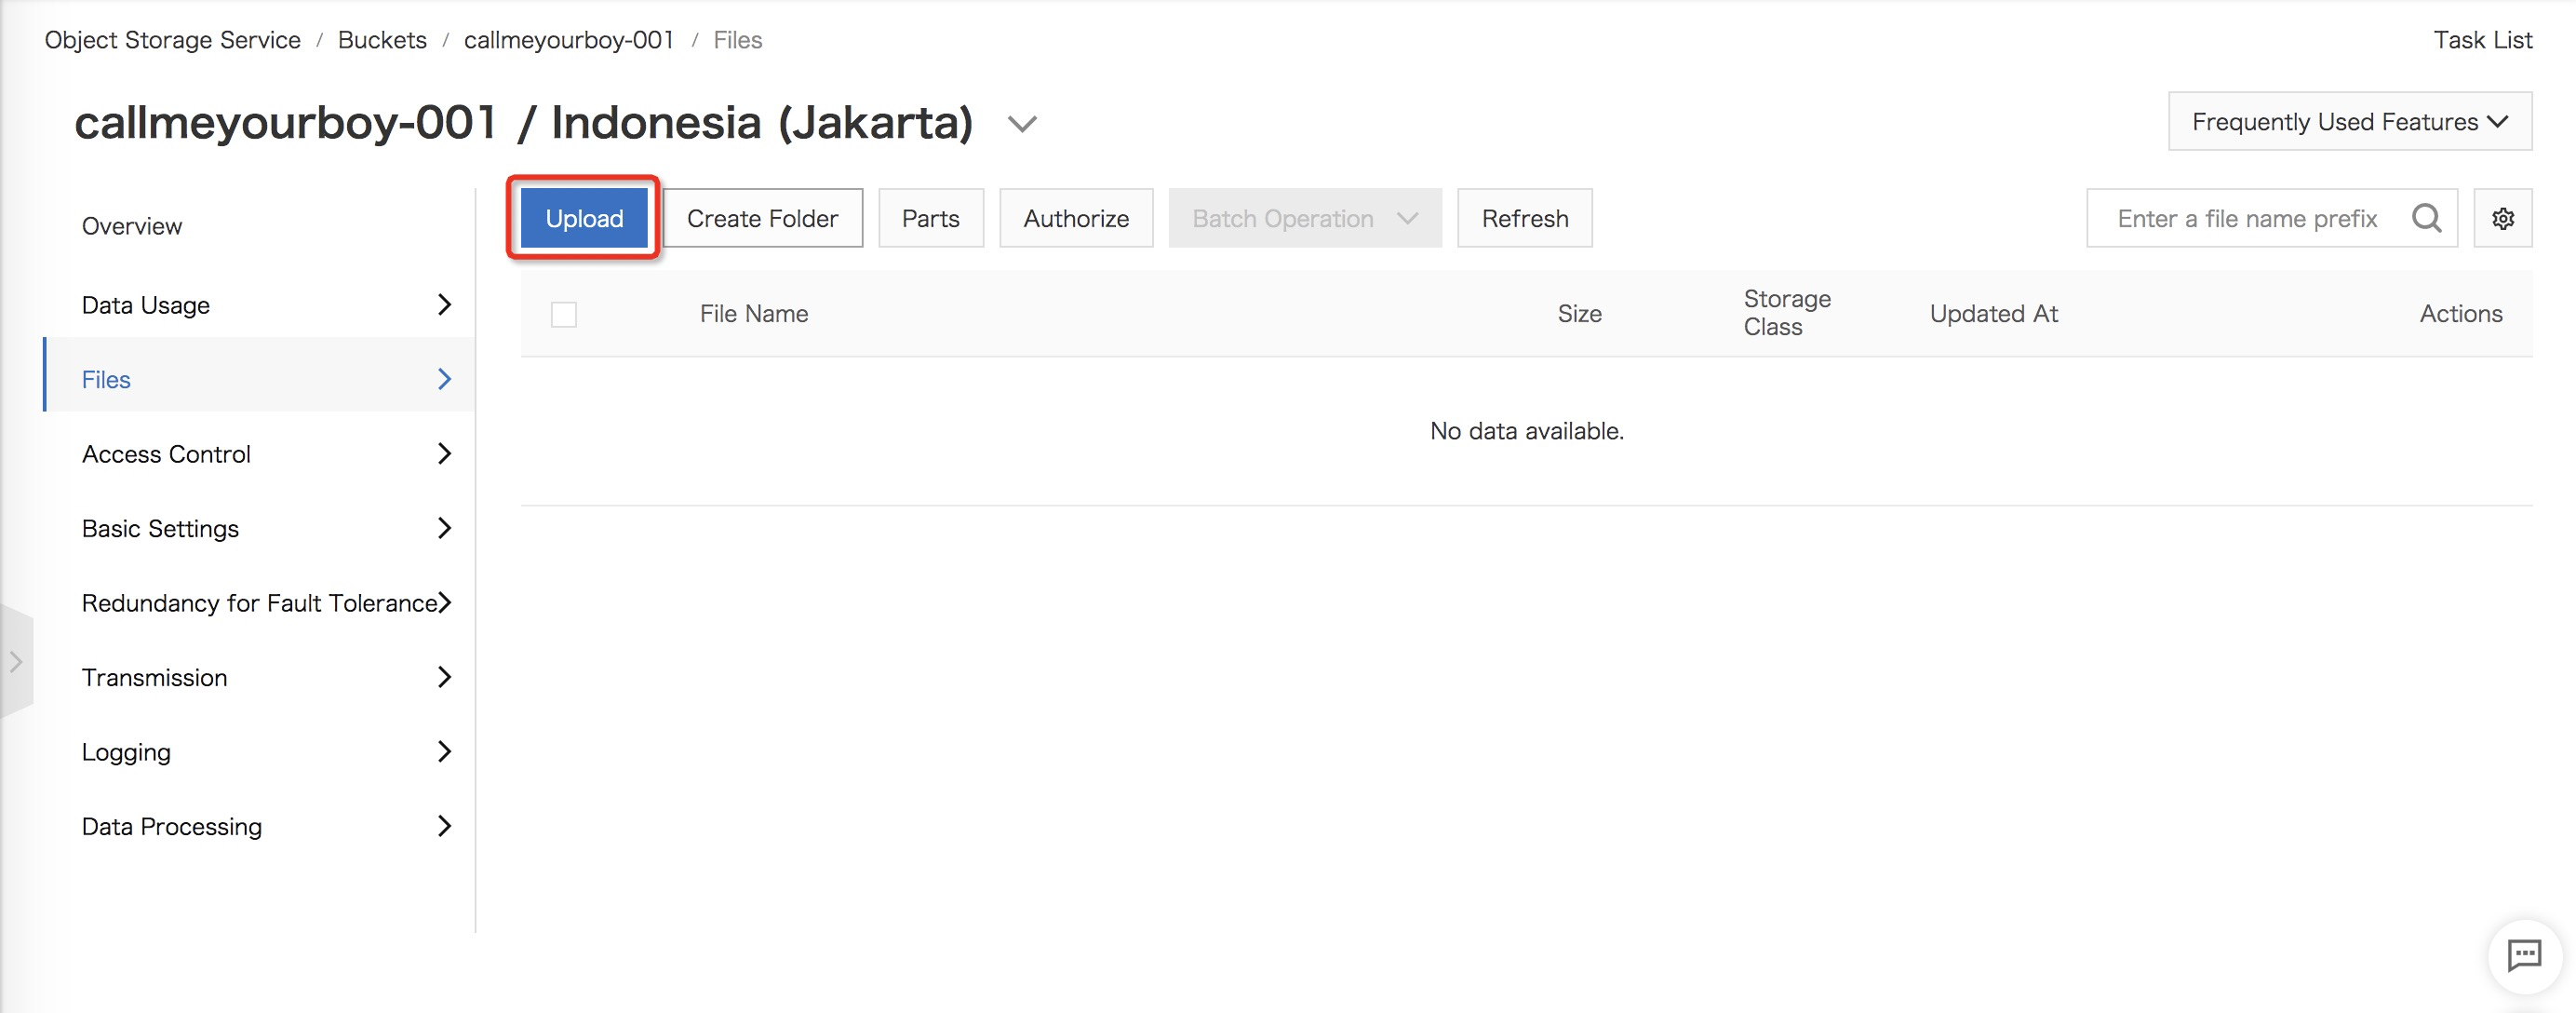
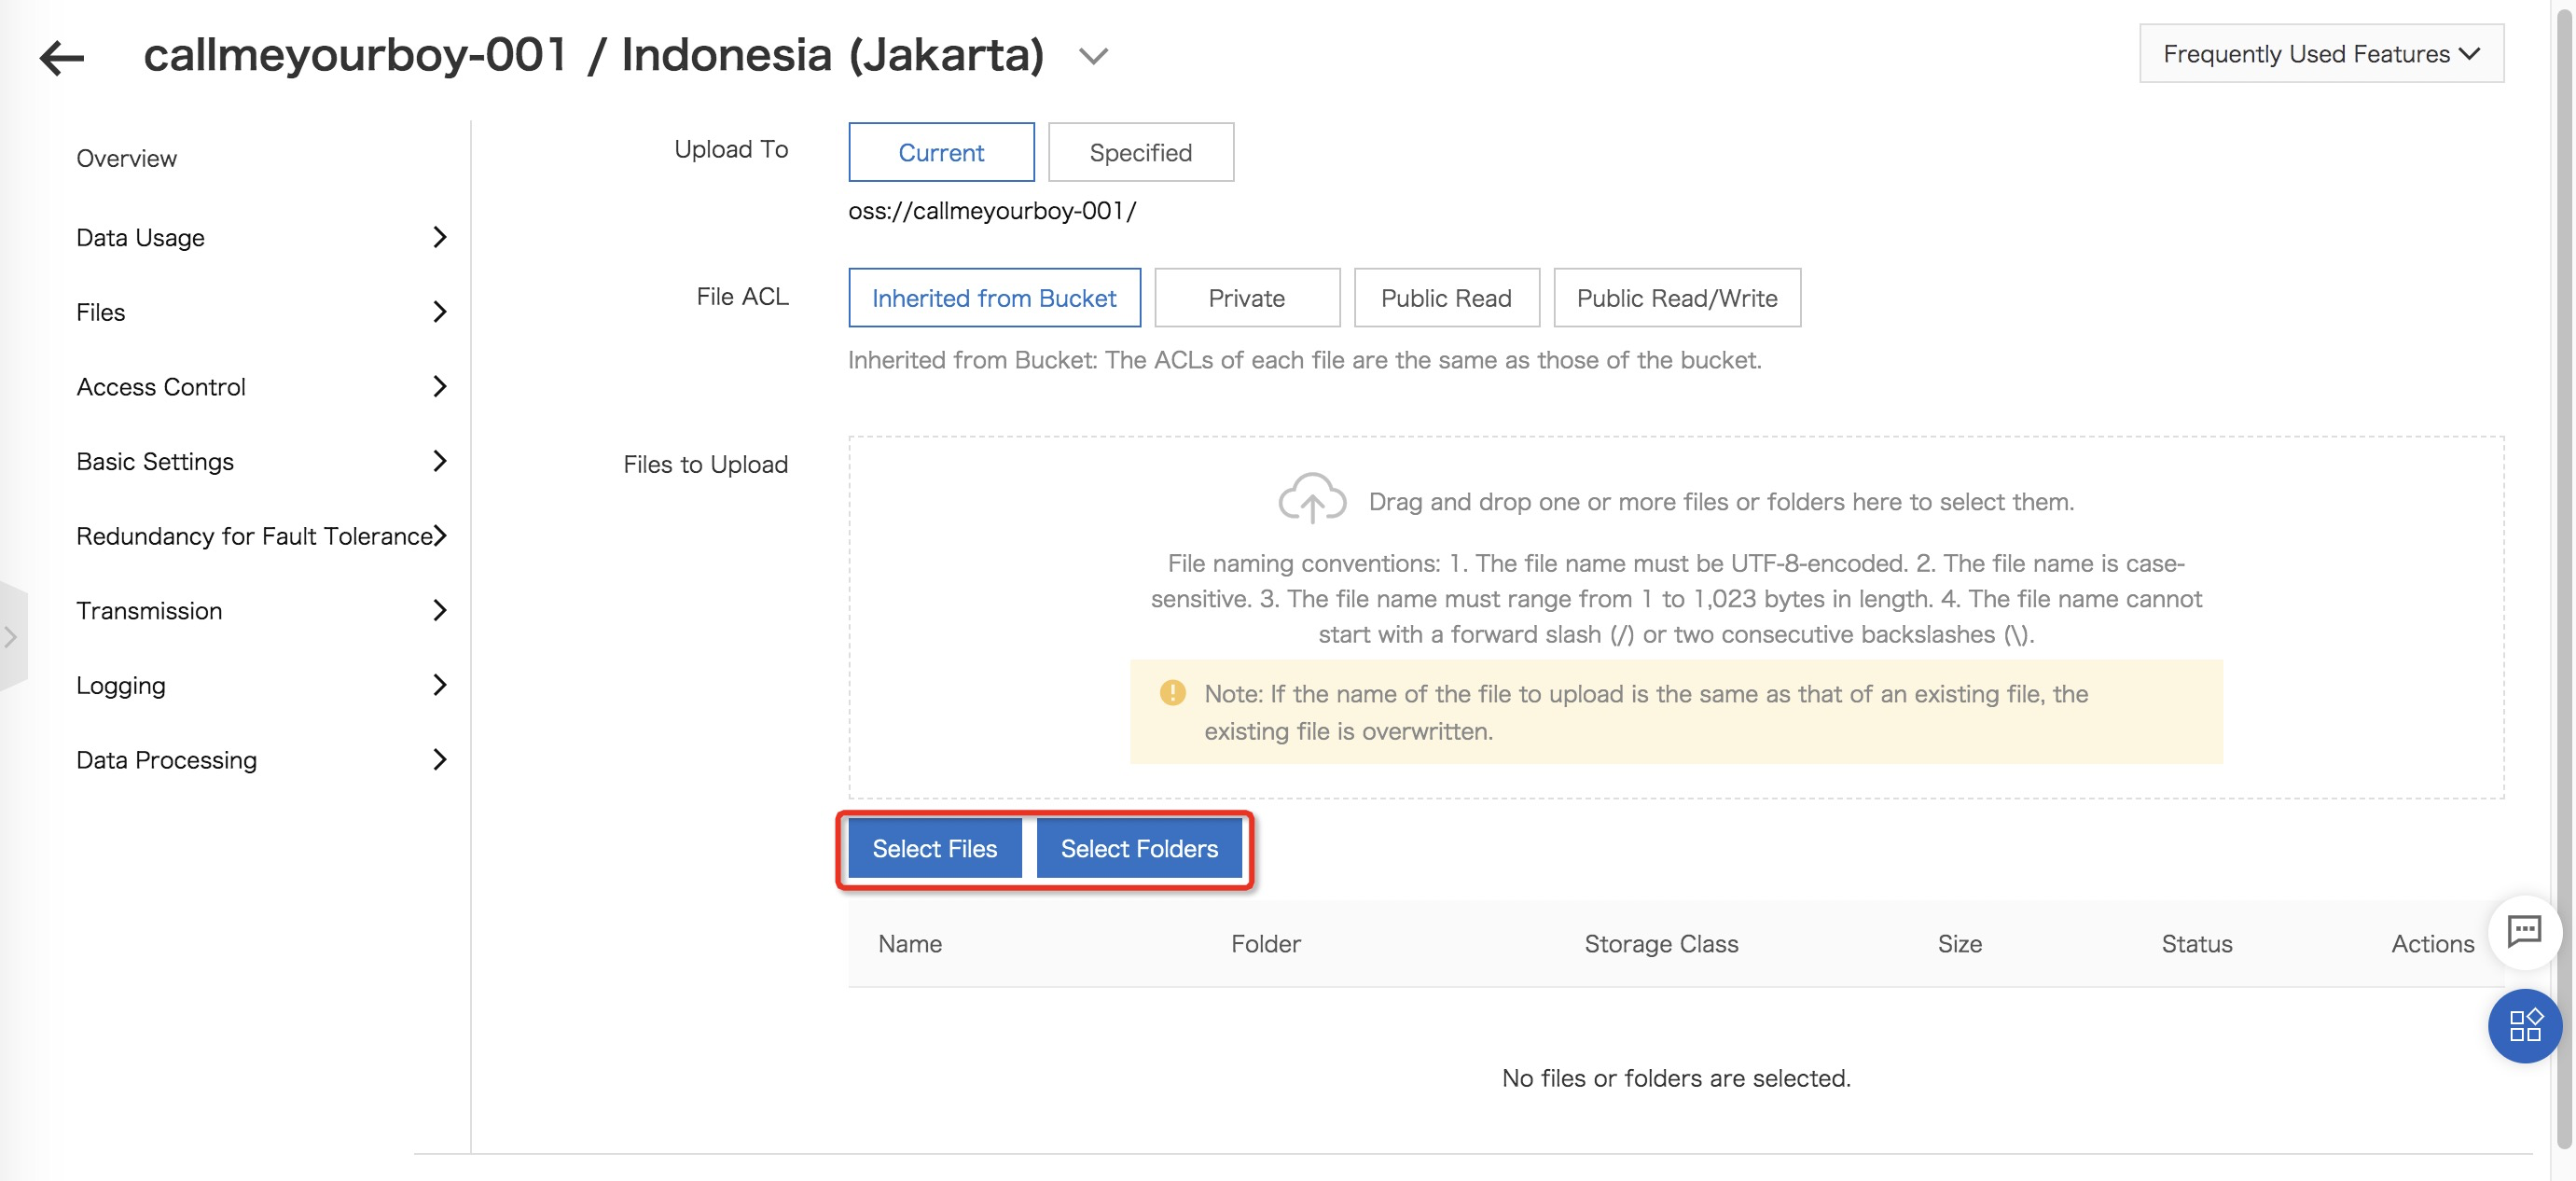
After that, you need to upload your file index.html to bucket. You can drag the file or choose Select Files to select specific files, or choose Select Folders to select the specific folders.
After it’s successfully uploaded (after you see the status), you can back to your bucket and find your files already in there.
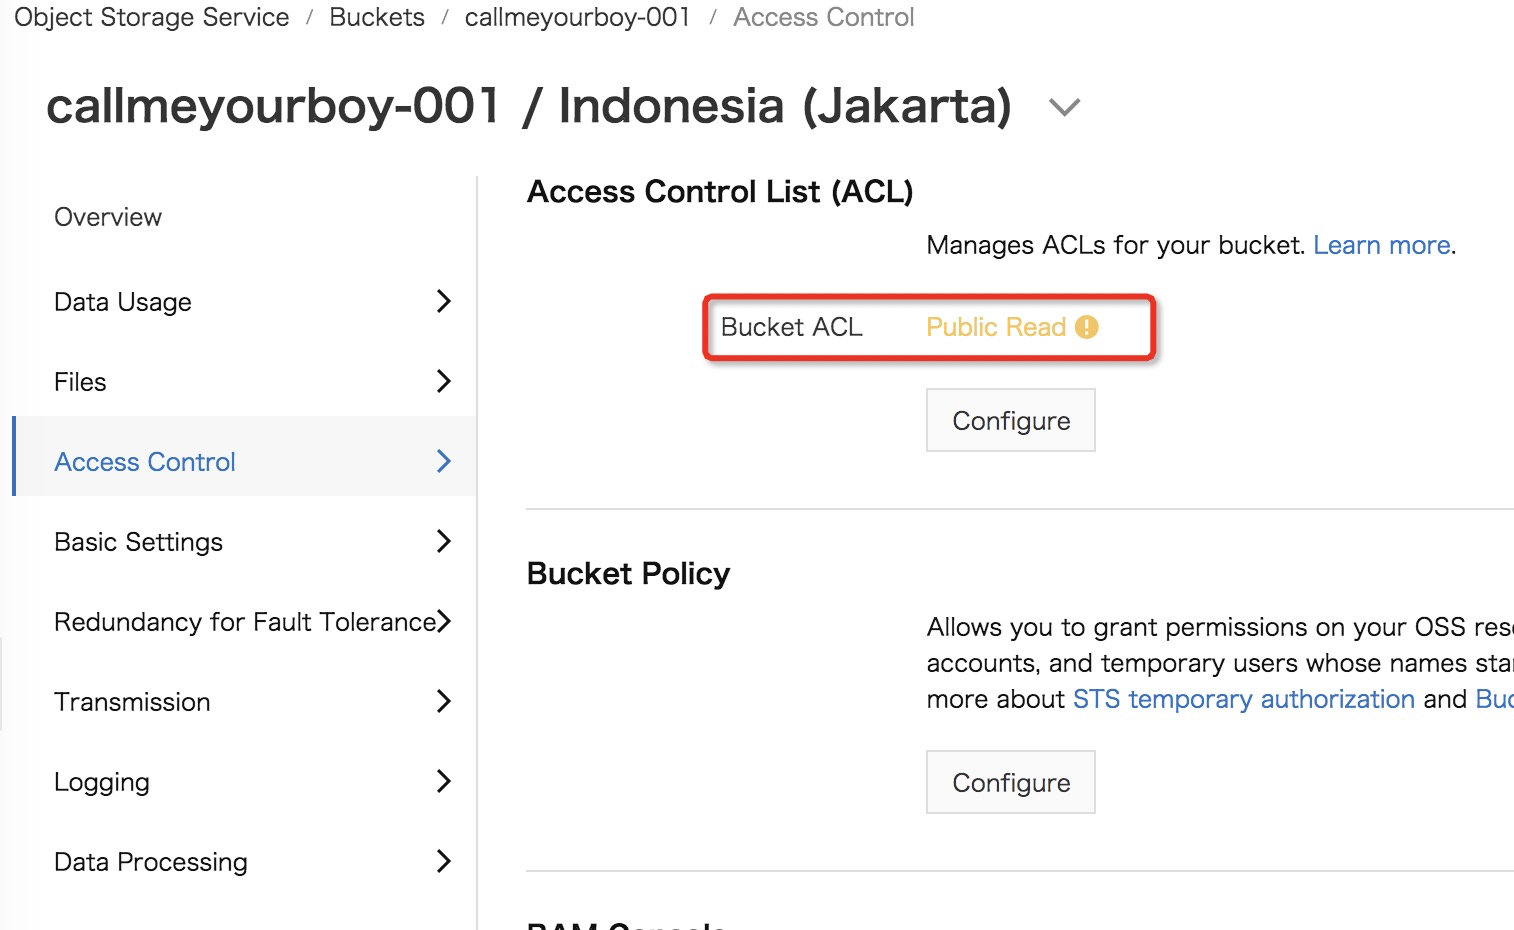
But!!! If you want to manage your bucket access, you need to do extra step. If you already had access public read, you can skip this and go to next journey for Binding Domain.
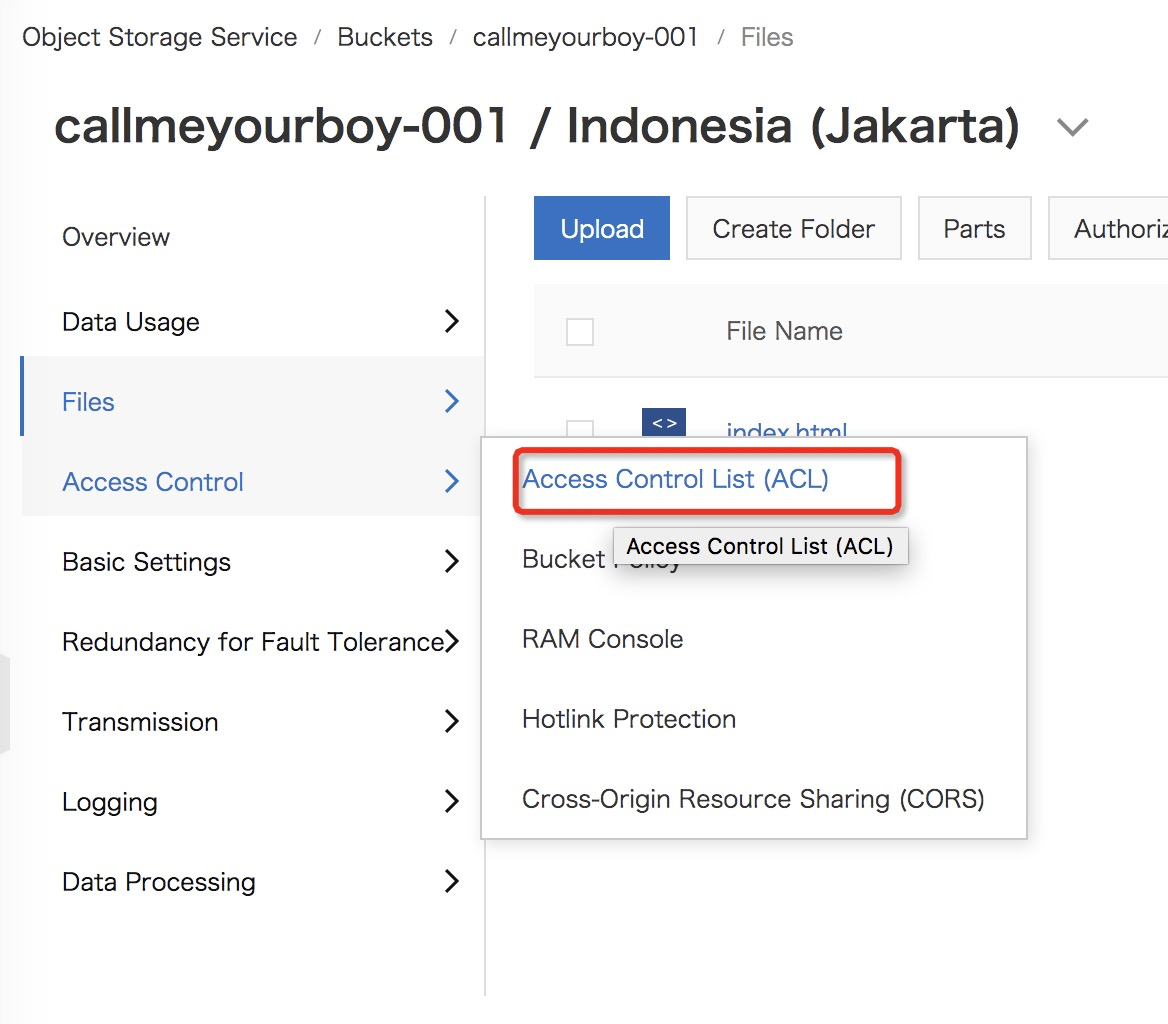
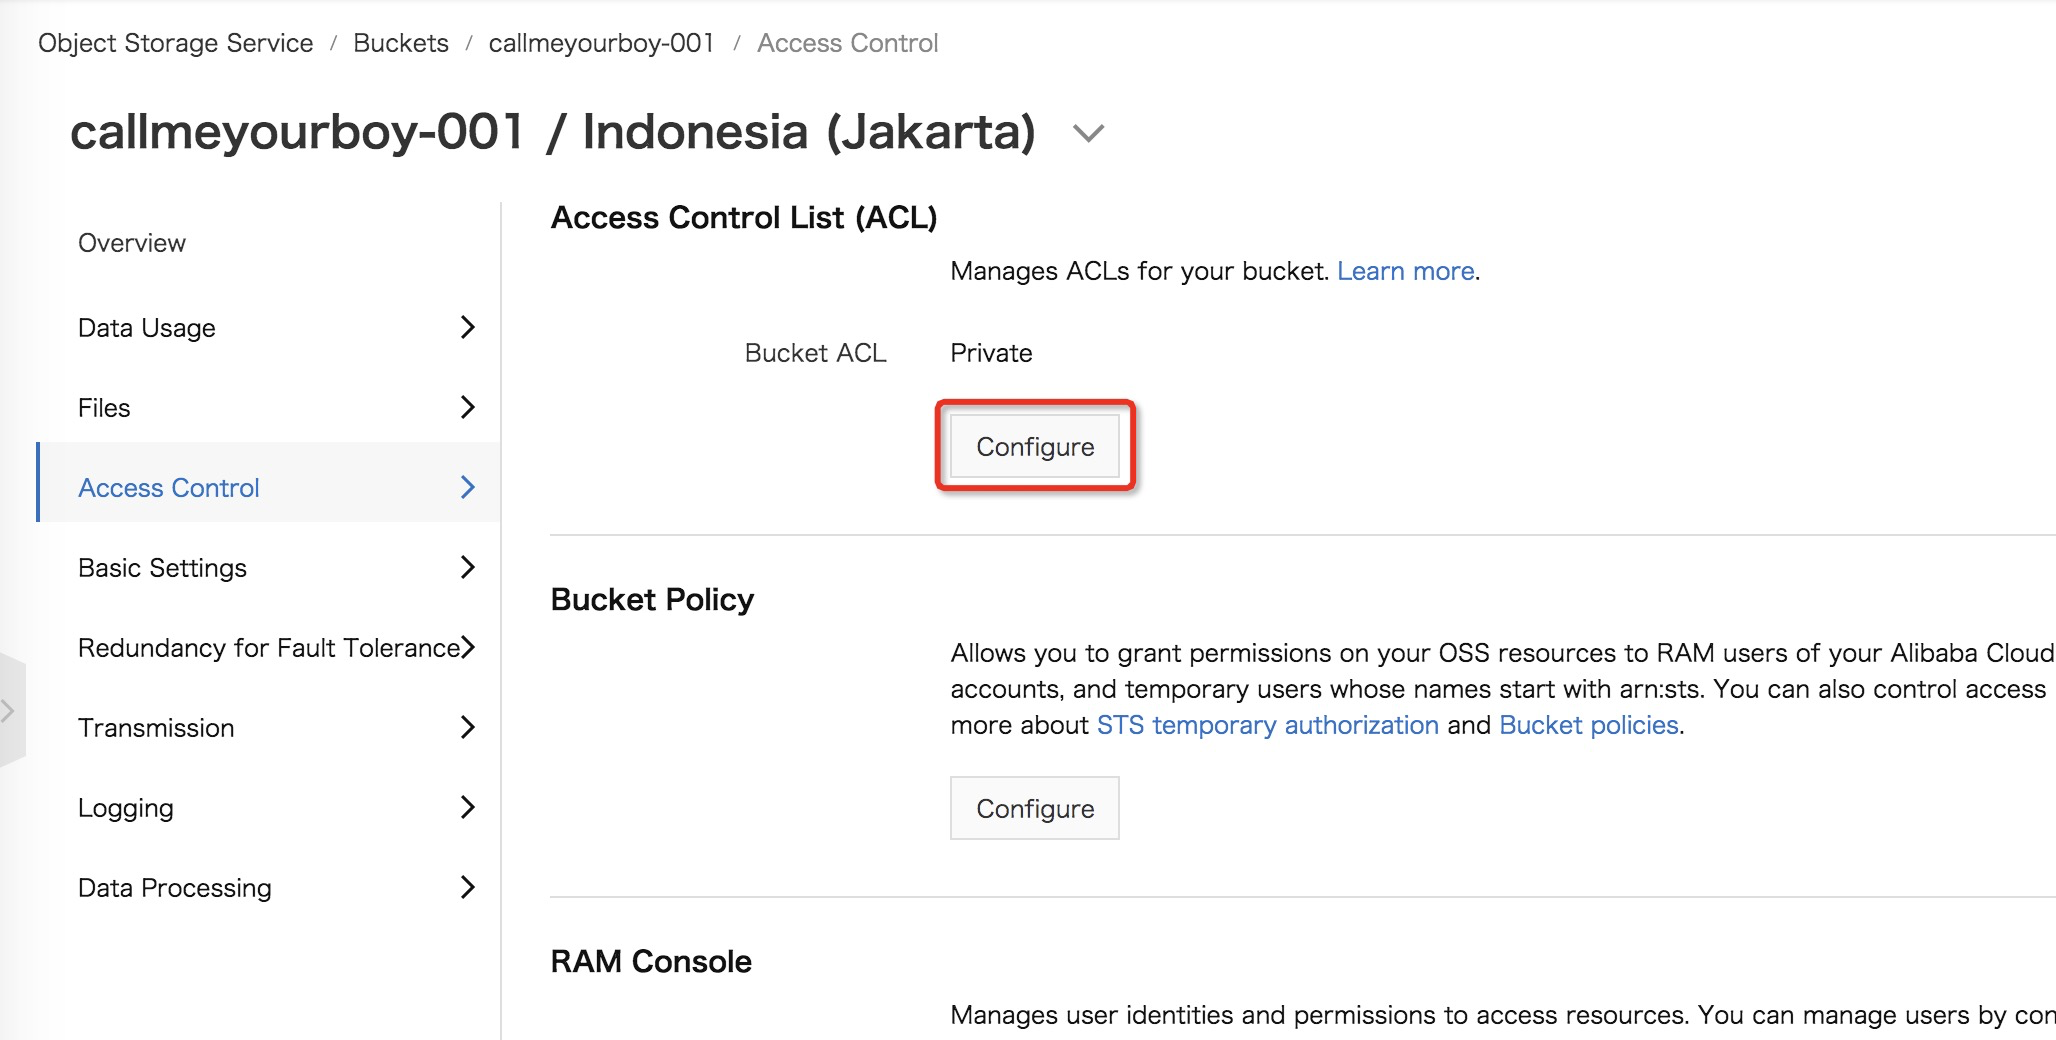
Go to menu on the left section, hover Access Control, and click Access Control List (ACL). Find ACL section and configure to use Public Read. It has 3 types, private is for the authenticated user only who can accessed , public read is making anonymous user possible to get read access for the bucket but not for write access (it can be done by authenticated users), and public read/write for both anonymous and authenticated users to do read and write operations with the bucket.
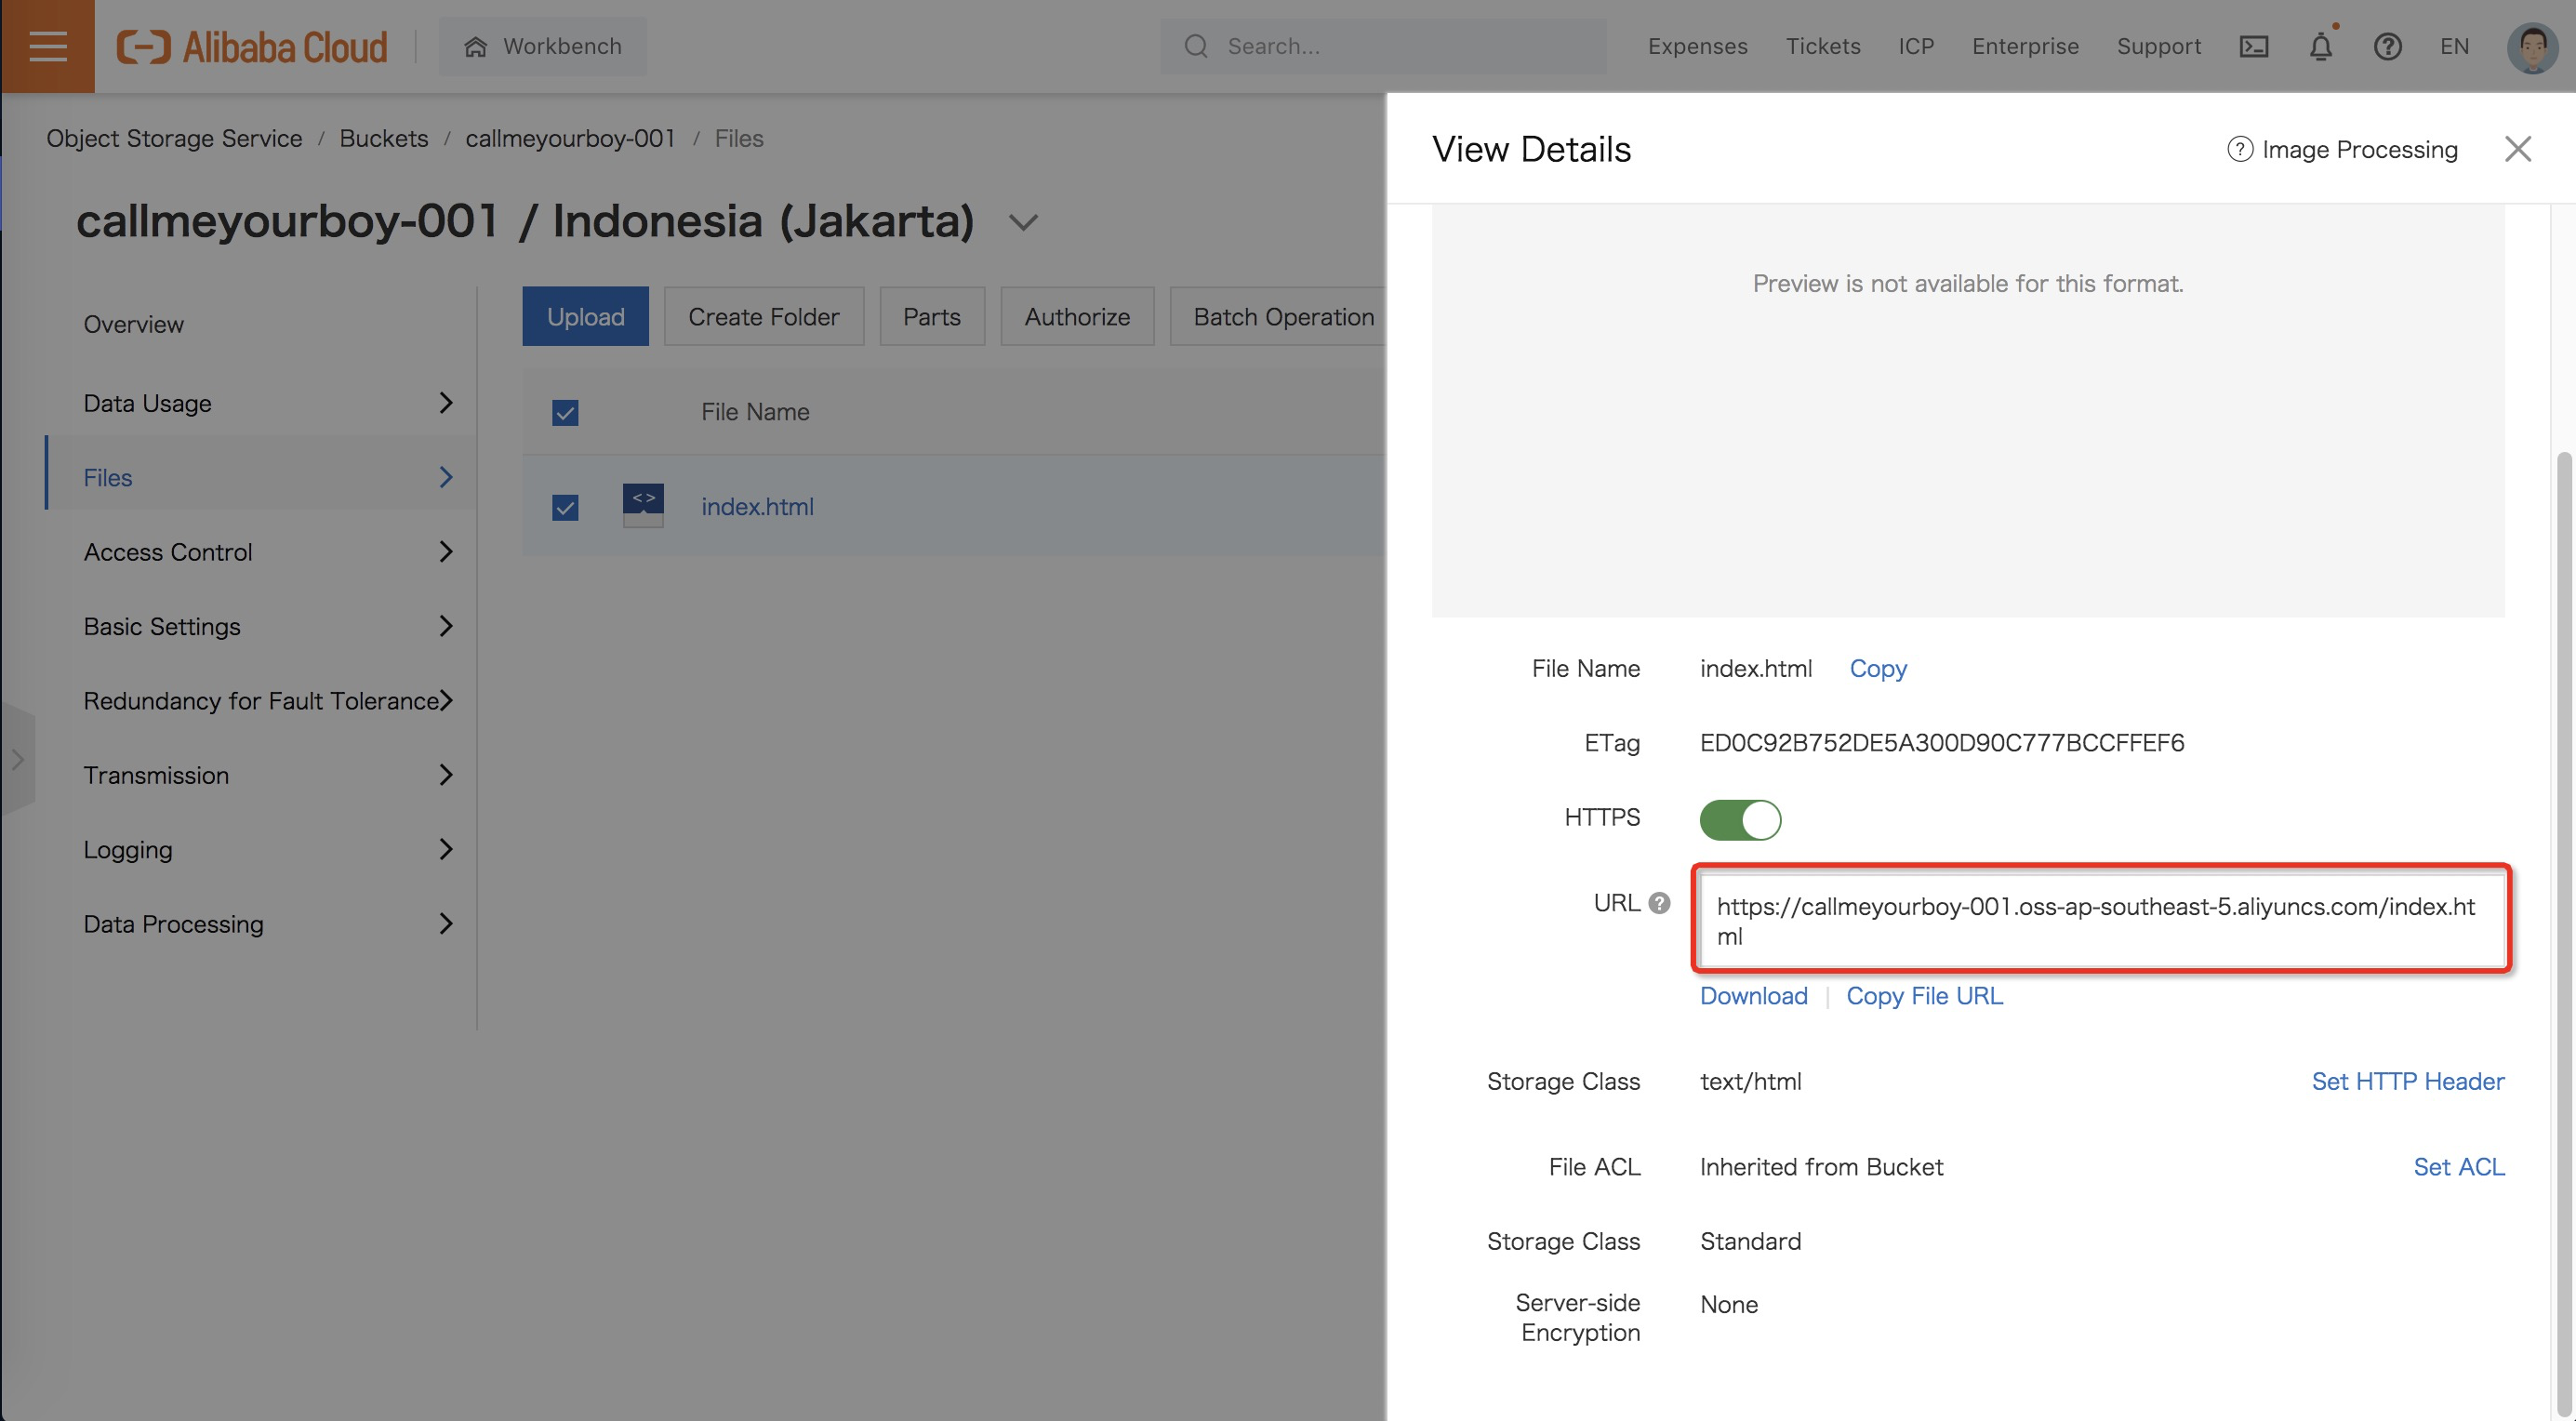
Then, you can try to access your file via browser or other way. Go back to your files and look the details, it will show the link for reaching out your files.
Waiittttt?!?! why download files, aren’t static pages already configured???
Yes, it’s already configured. You need to run the next steps to make your bucket can be accessed as a static website. Maybe as prerequisites, y’all need domain name.
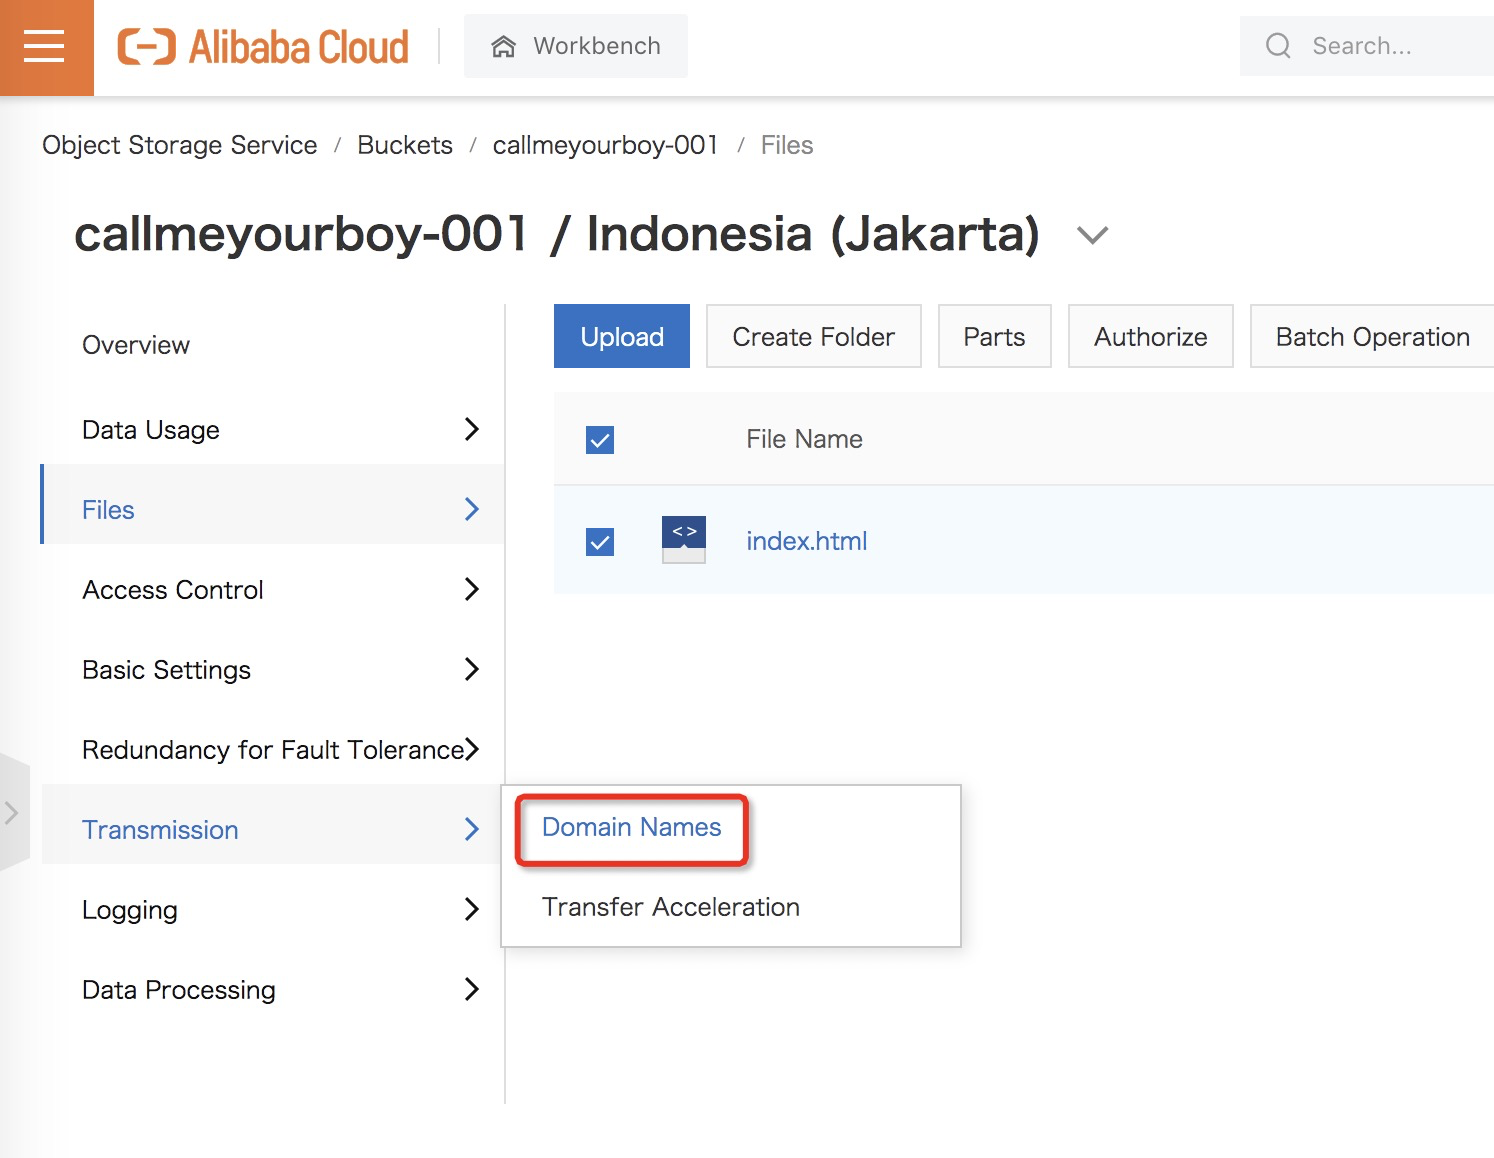
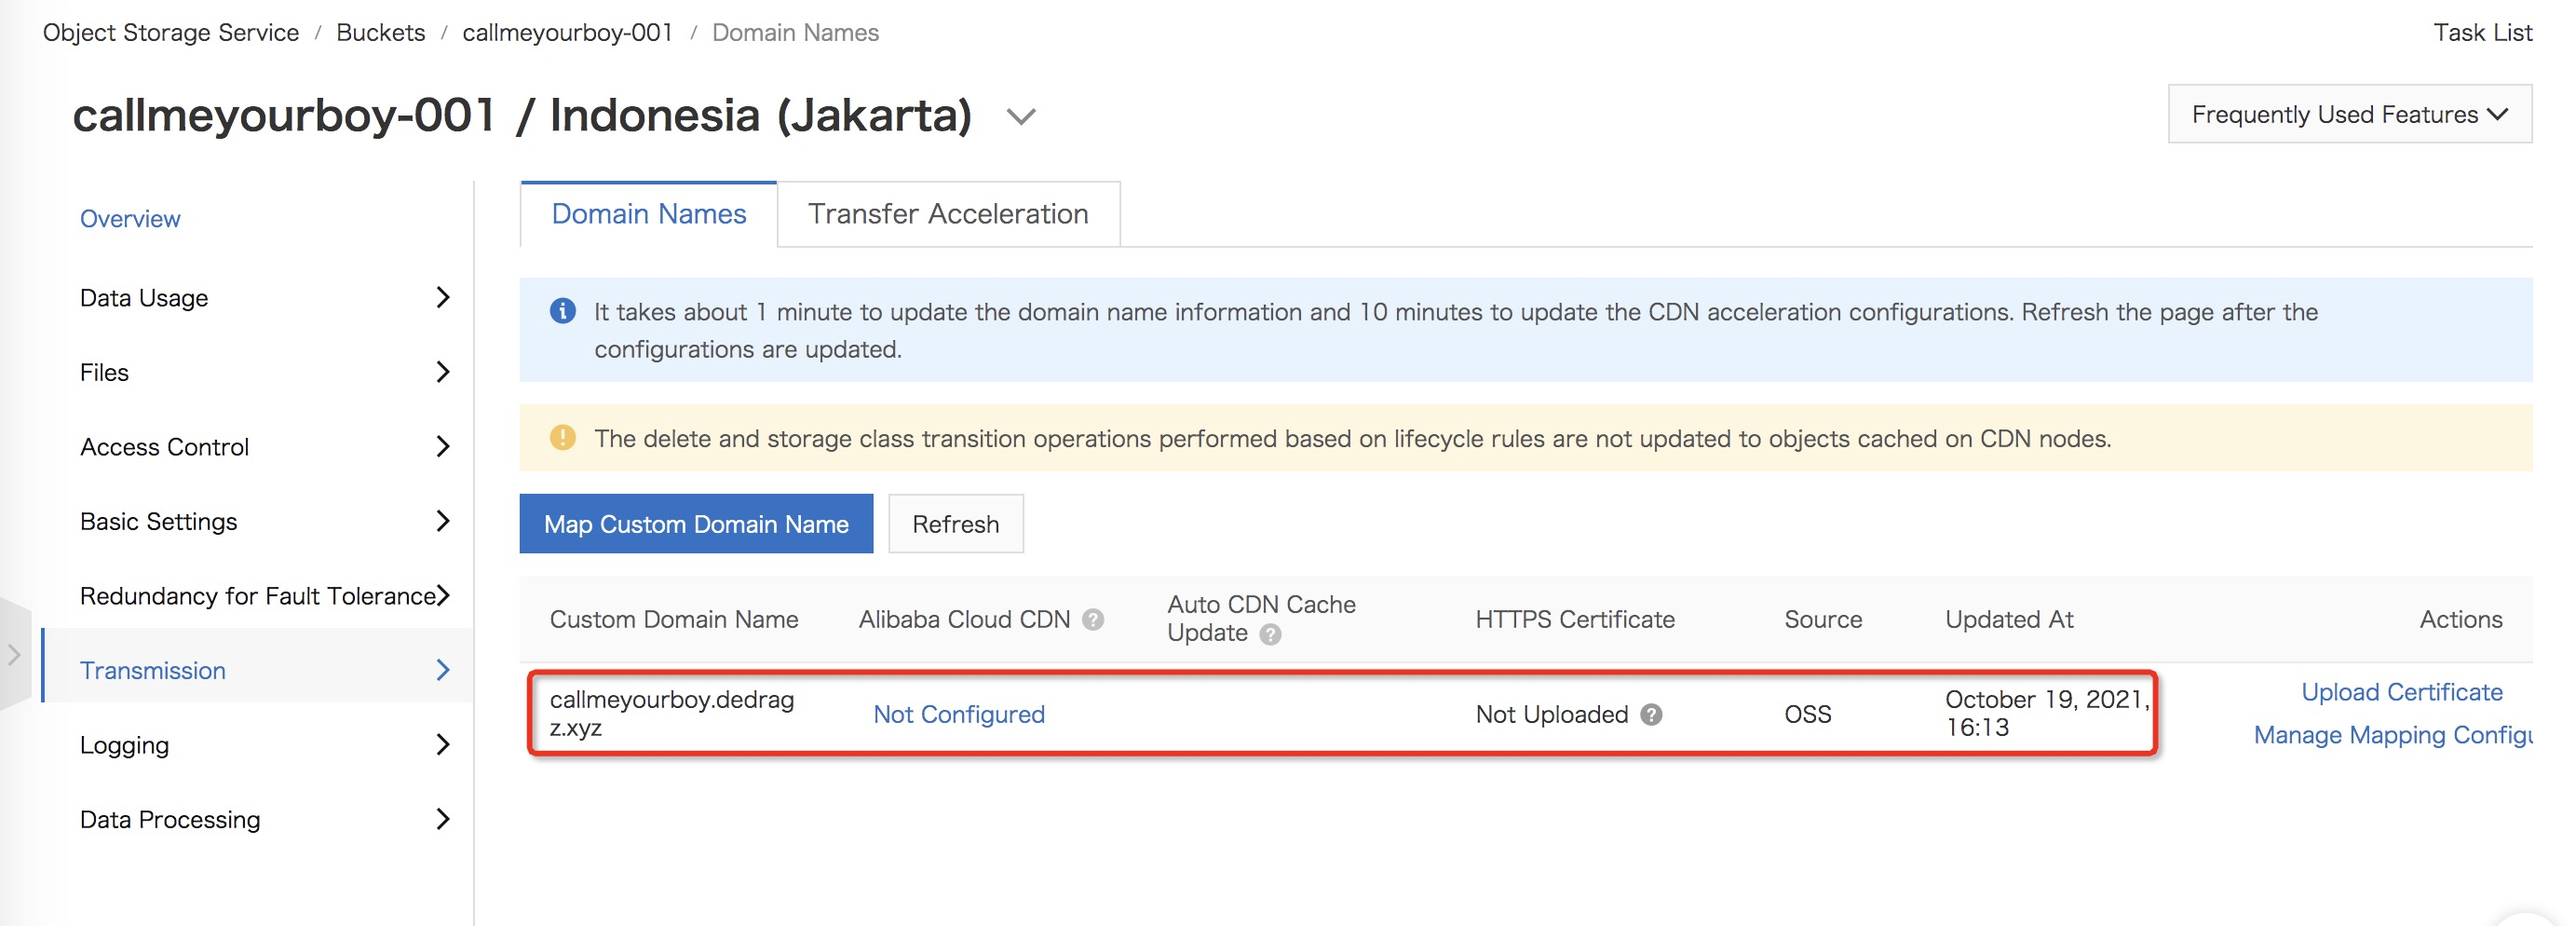
Let’s bind our domain!
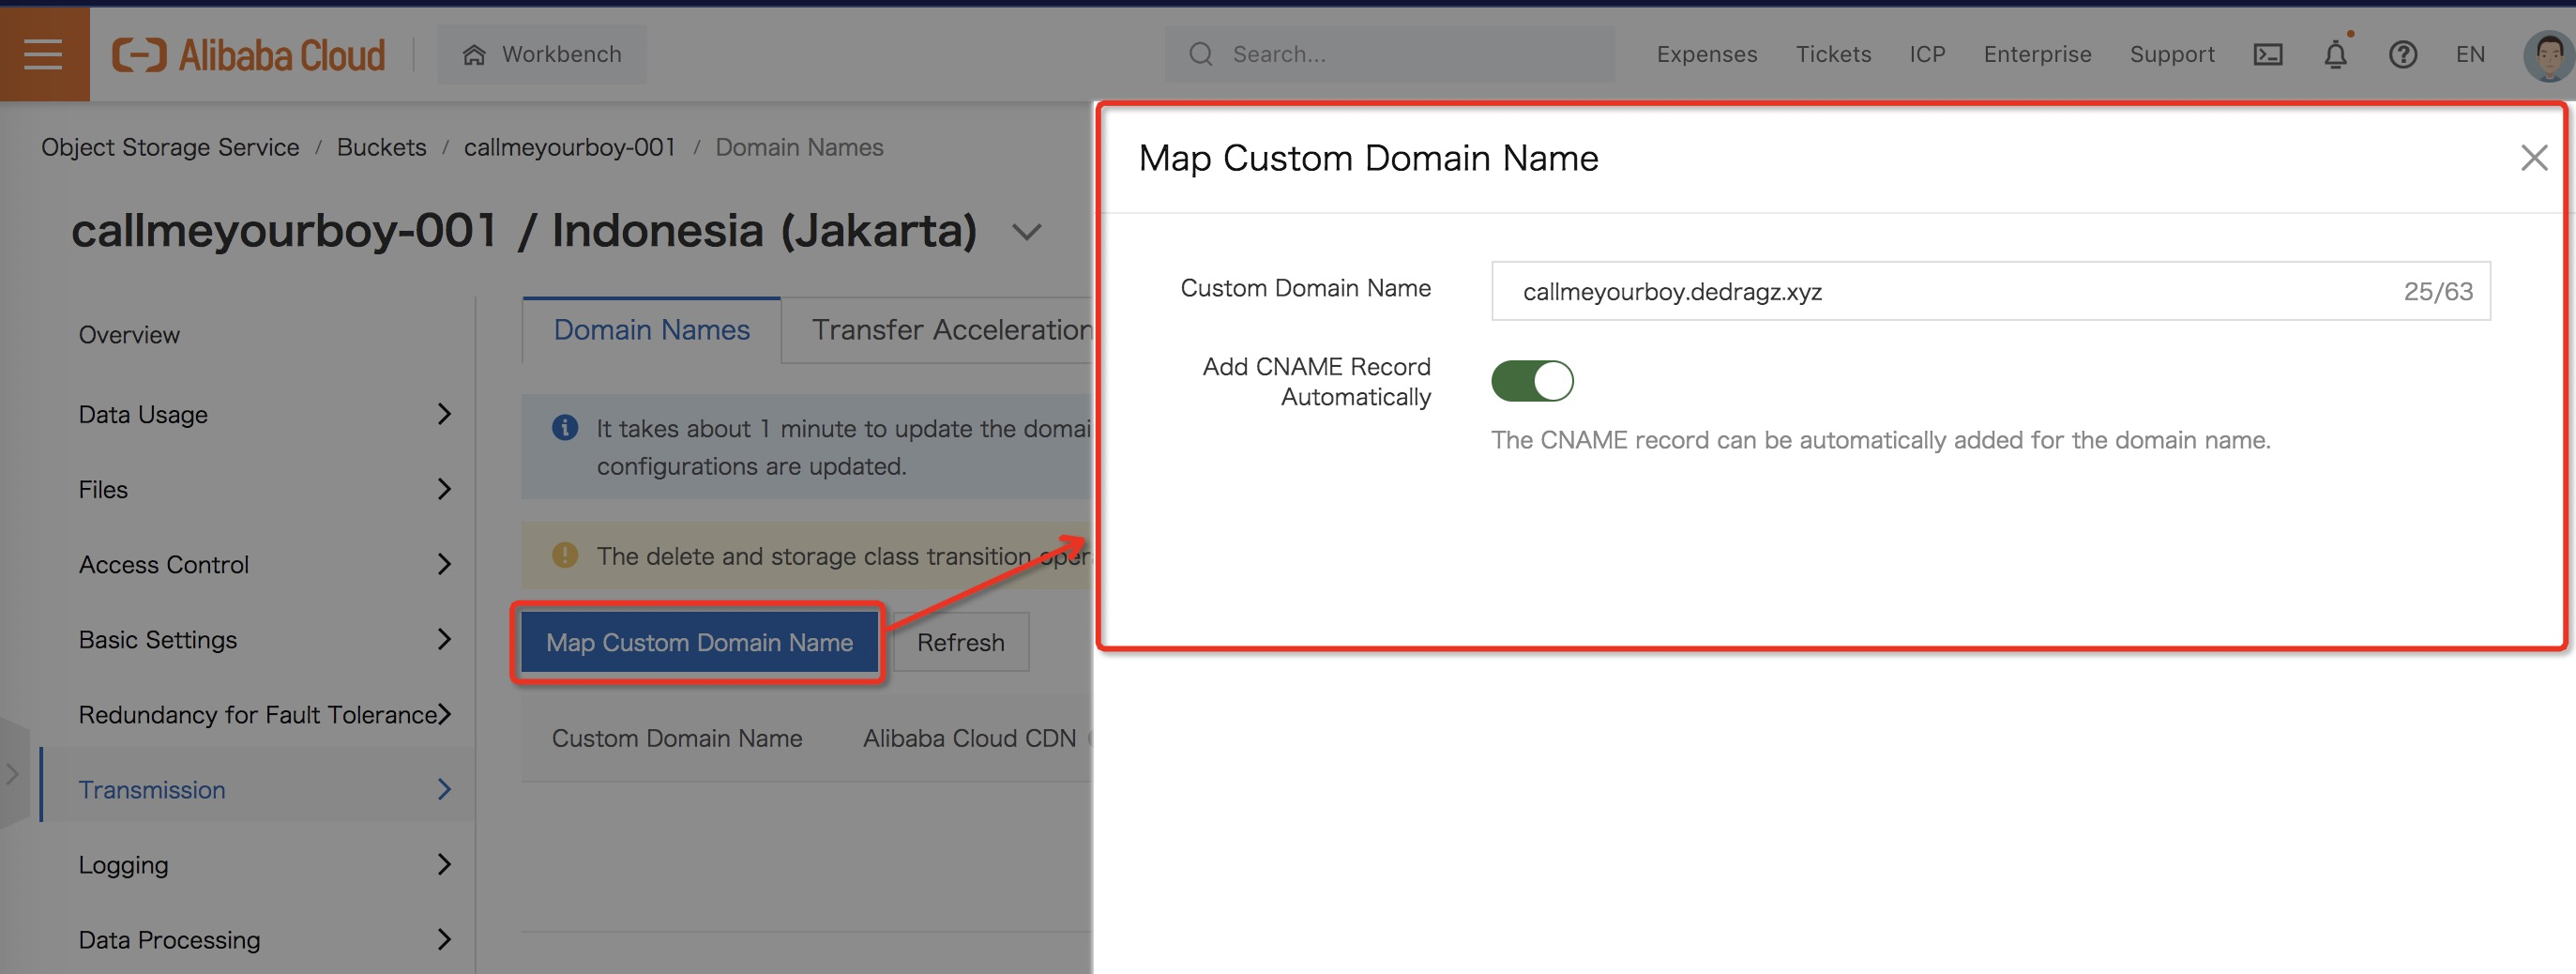
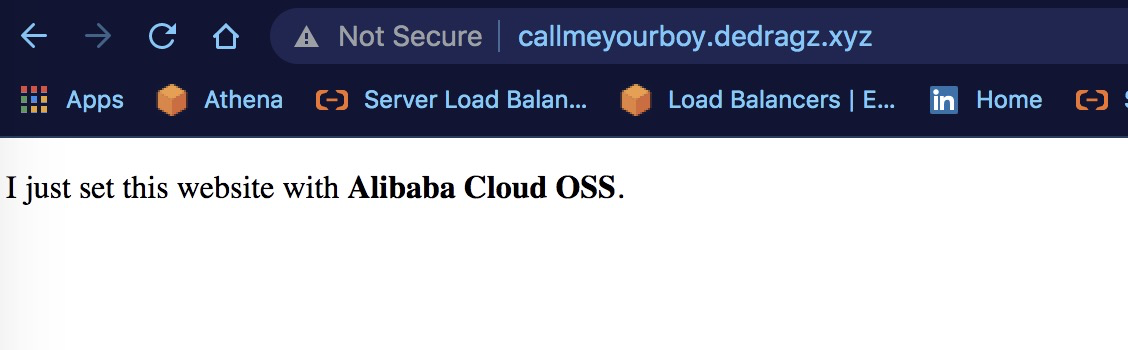
Look into menu and hover to Transmission and choose Domain Names. Assume you have domain name dedragz.xyz. You just need to choose Map Custom Domain Name and add your records *.dedragz.xyz. Here i’ll try to add callmeyourboy.dedragz.xyz and don’t forget to enable CNAME record automatically. Now, you are able to access it via callmeyourboy.dedragz.xyz.
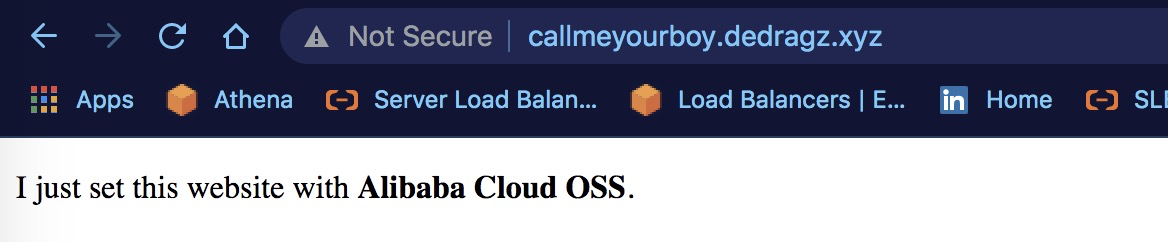
Wow, you finally do it!
But, shortly after, your partner accidentally overwrite your file and change the content. It’s okay if it’s simple demo, but how if it’s complex one?
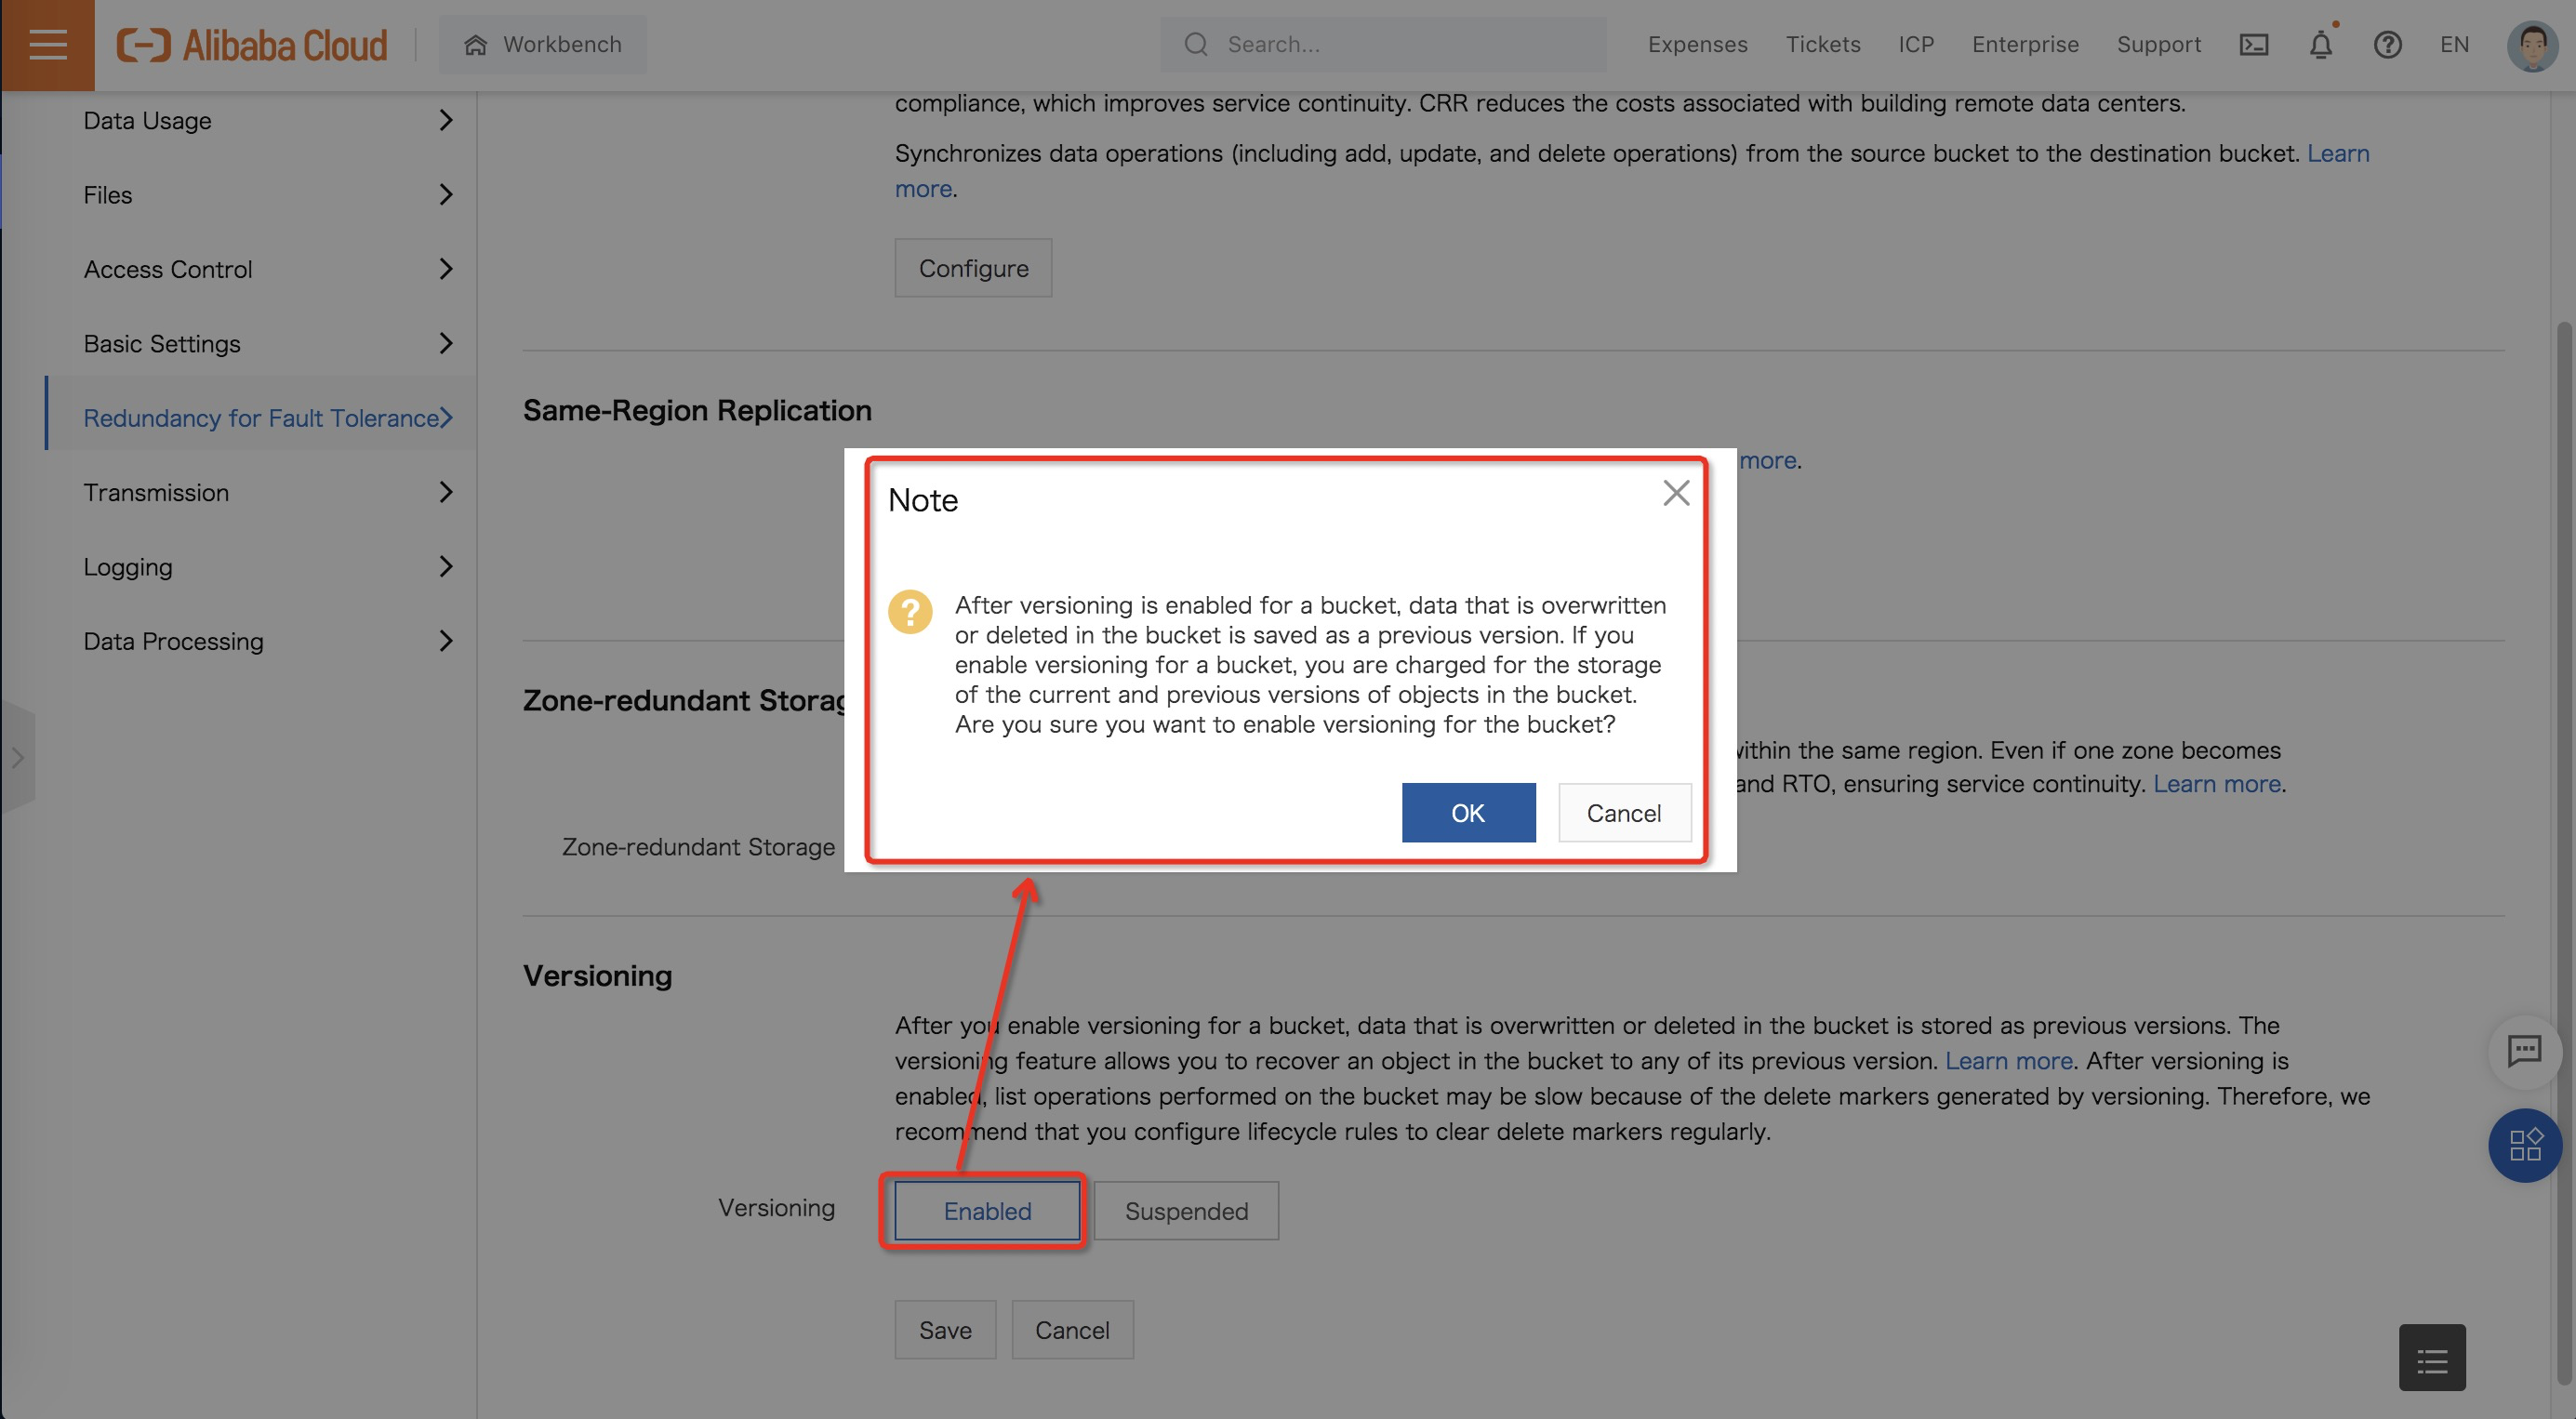
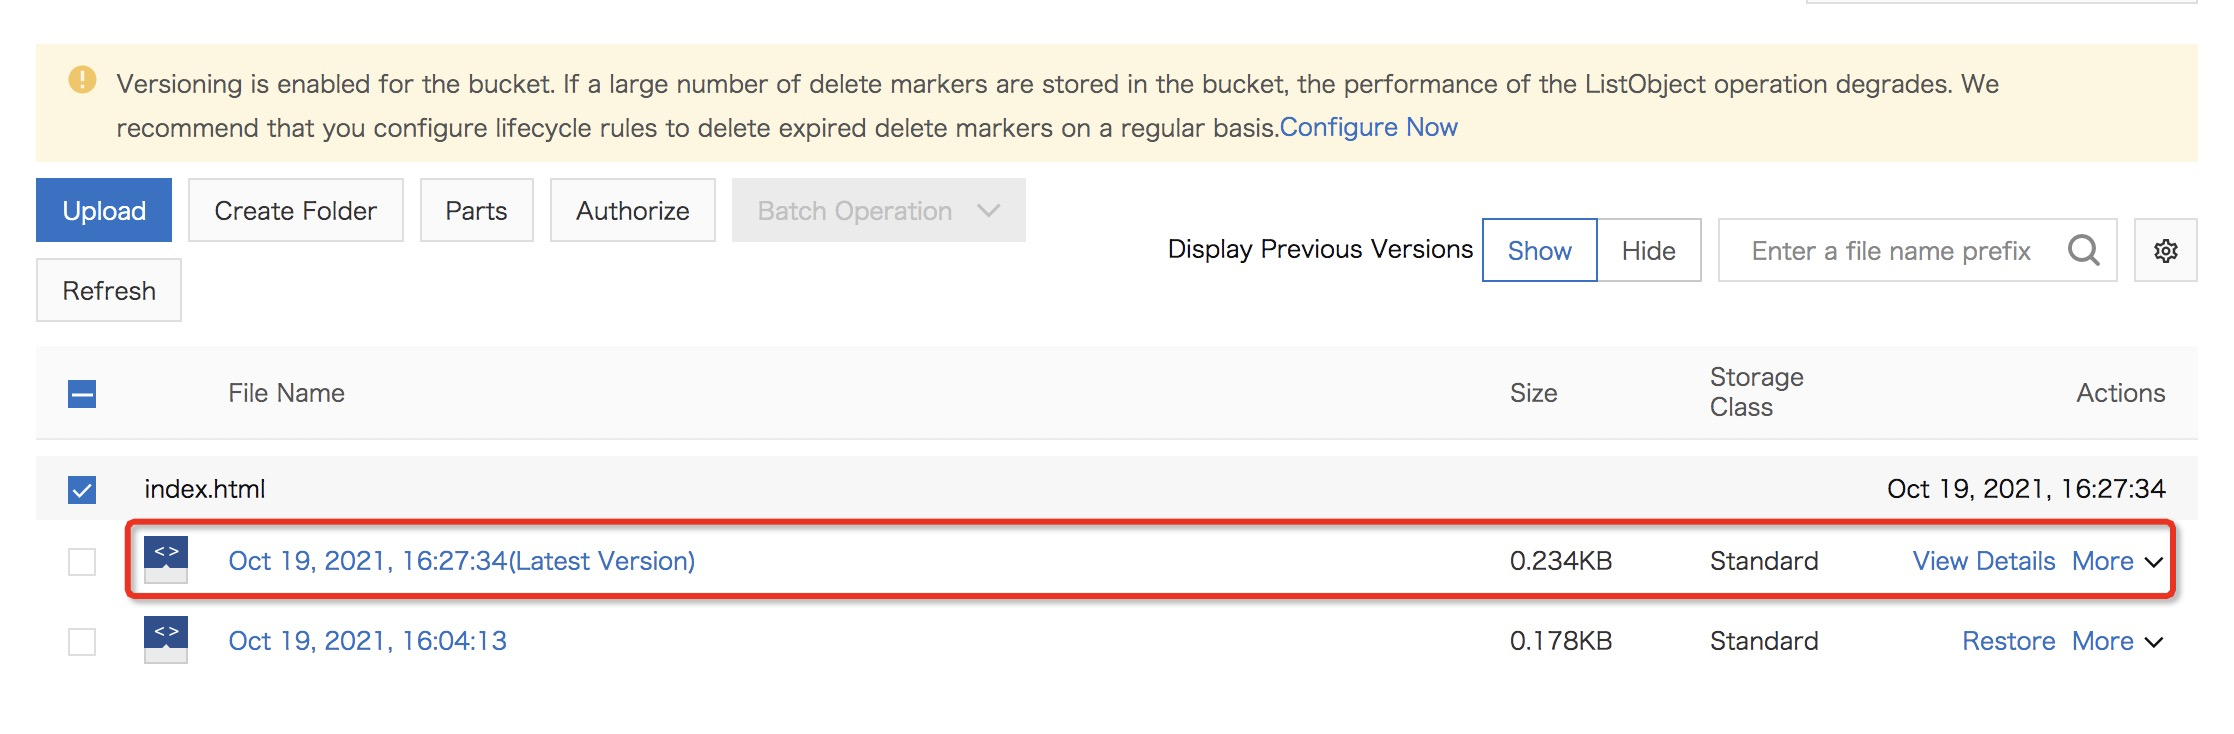
To prevent this, the solution is to use Versioning. It will reduce possible data loss. It will record the change and you can restore your data wherever you want to!
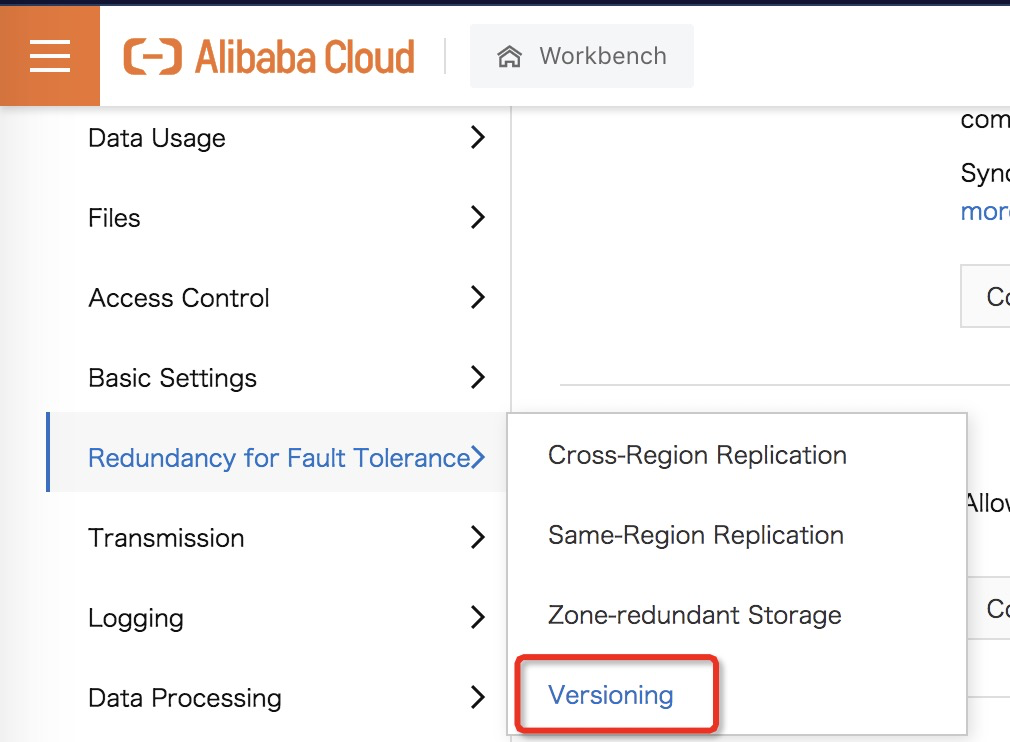
Go to menu and hover to Redundancy for Fault Tolerance, choose Versioning. Find the Versioning section, then Enable it!
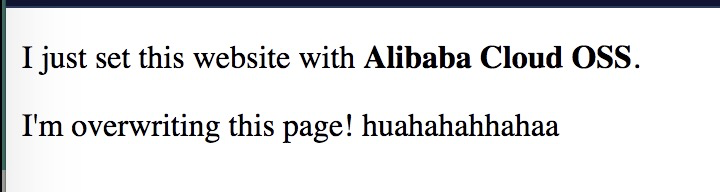
OK, as sample, let’s say our index homepage looks like this right now.
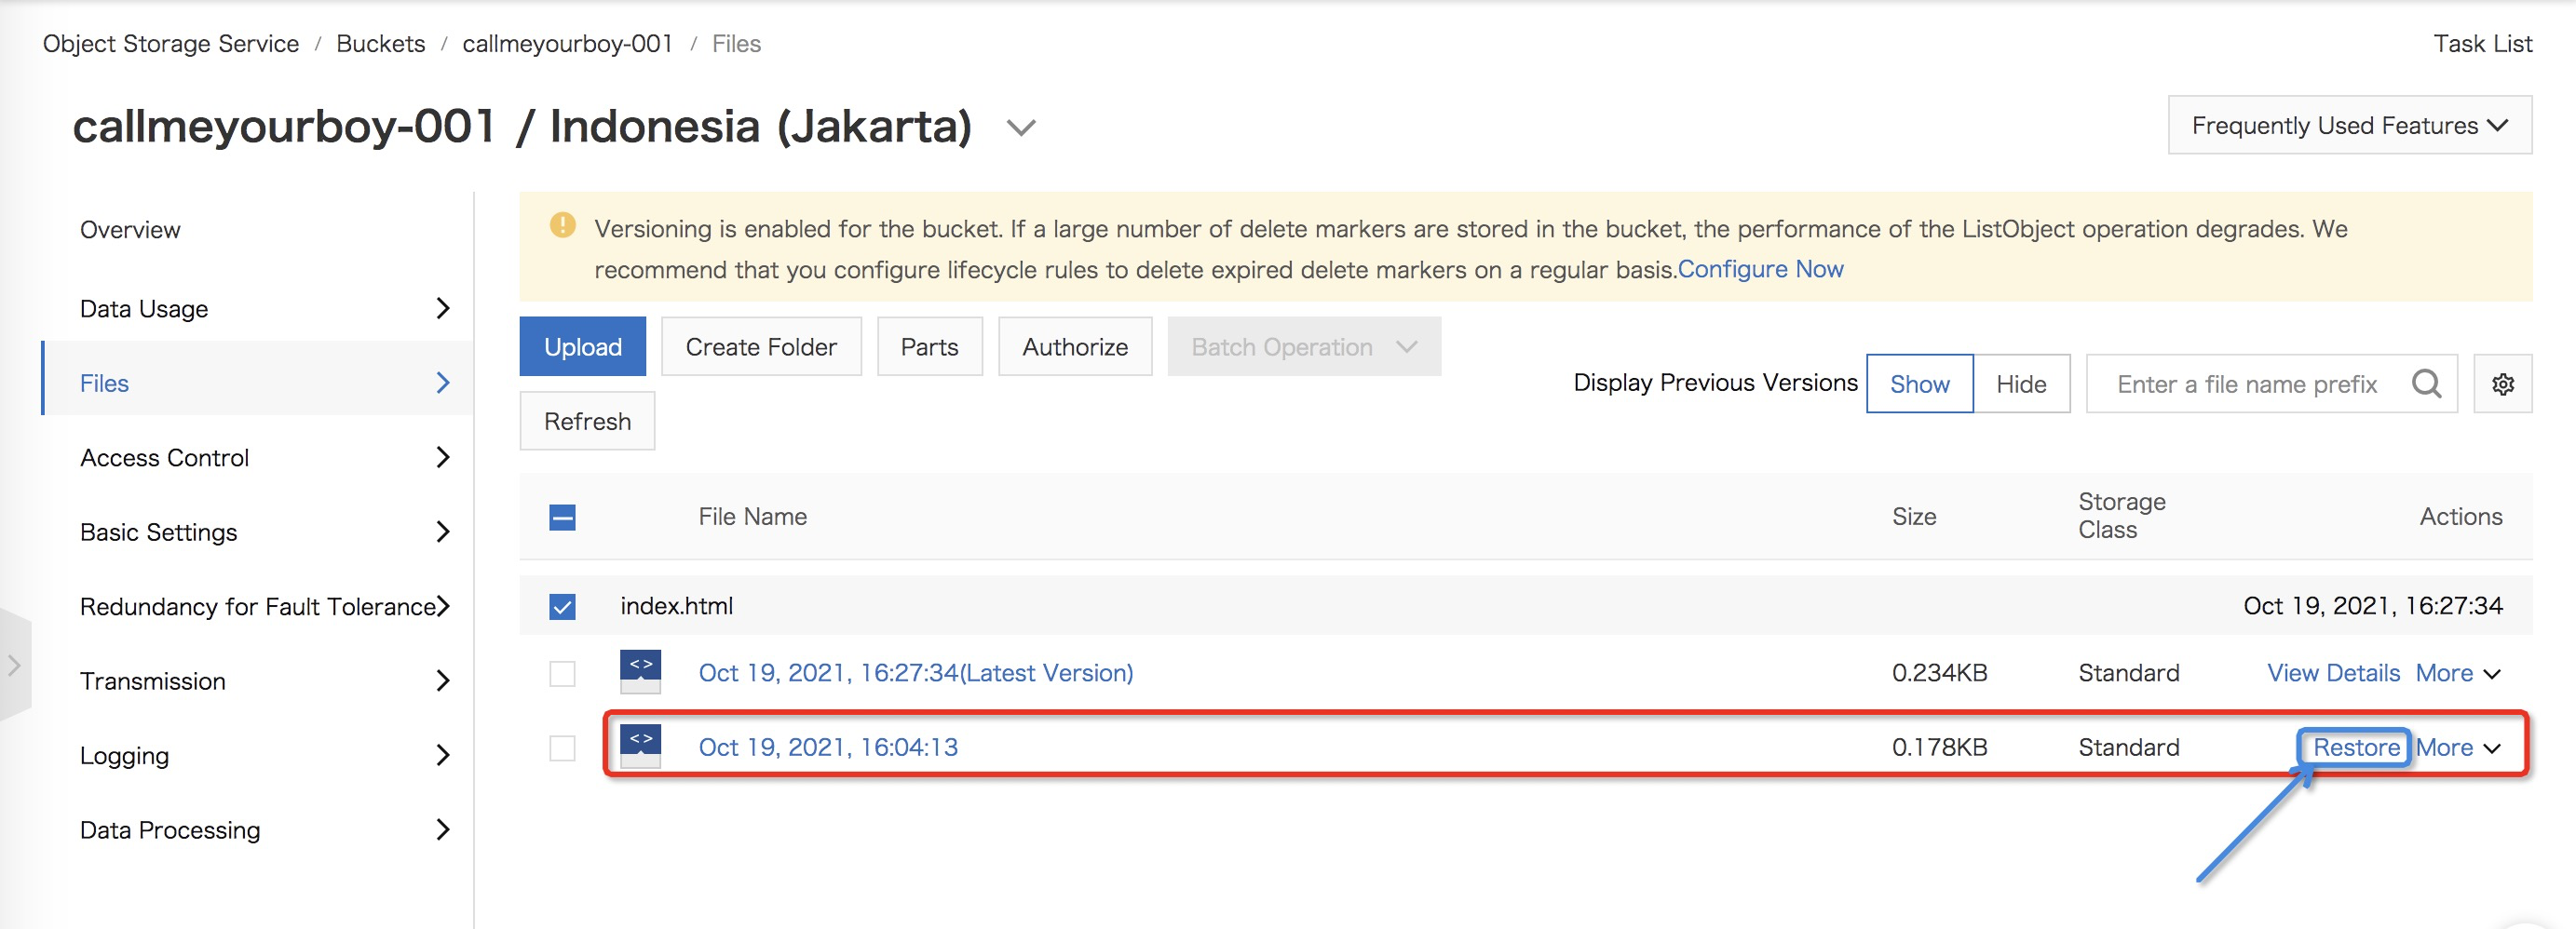
If we use Versioning, it will log the changes. When the changes happened and other information. You just need to do ‘Restore‘ to back to your previous data.
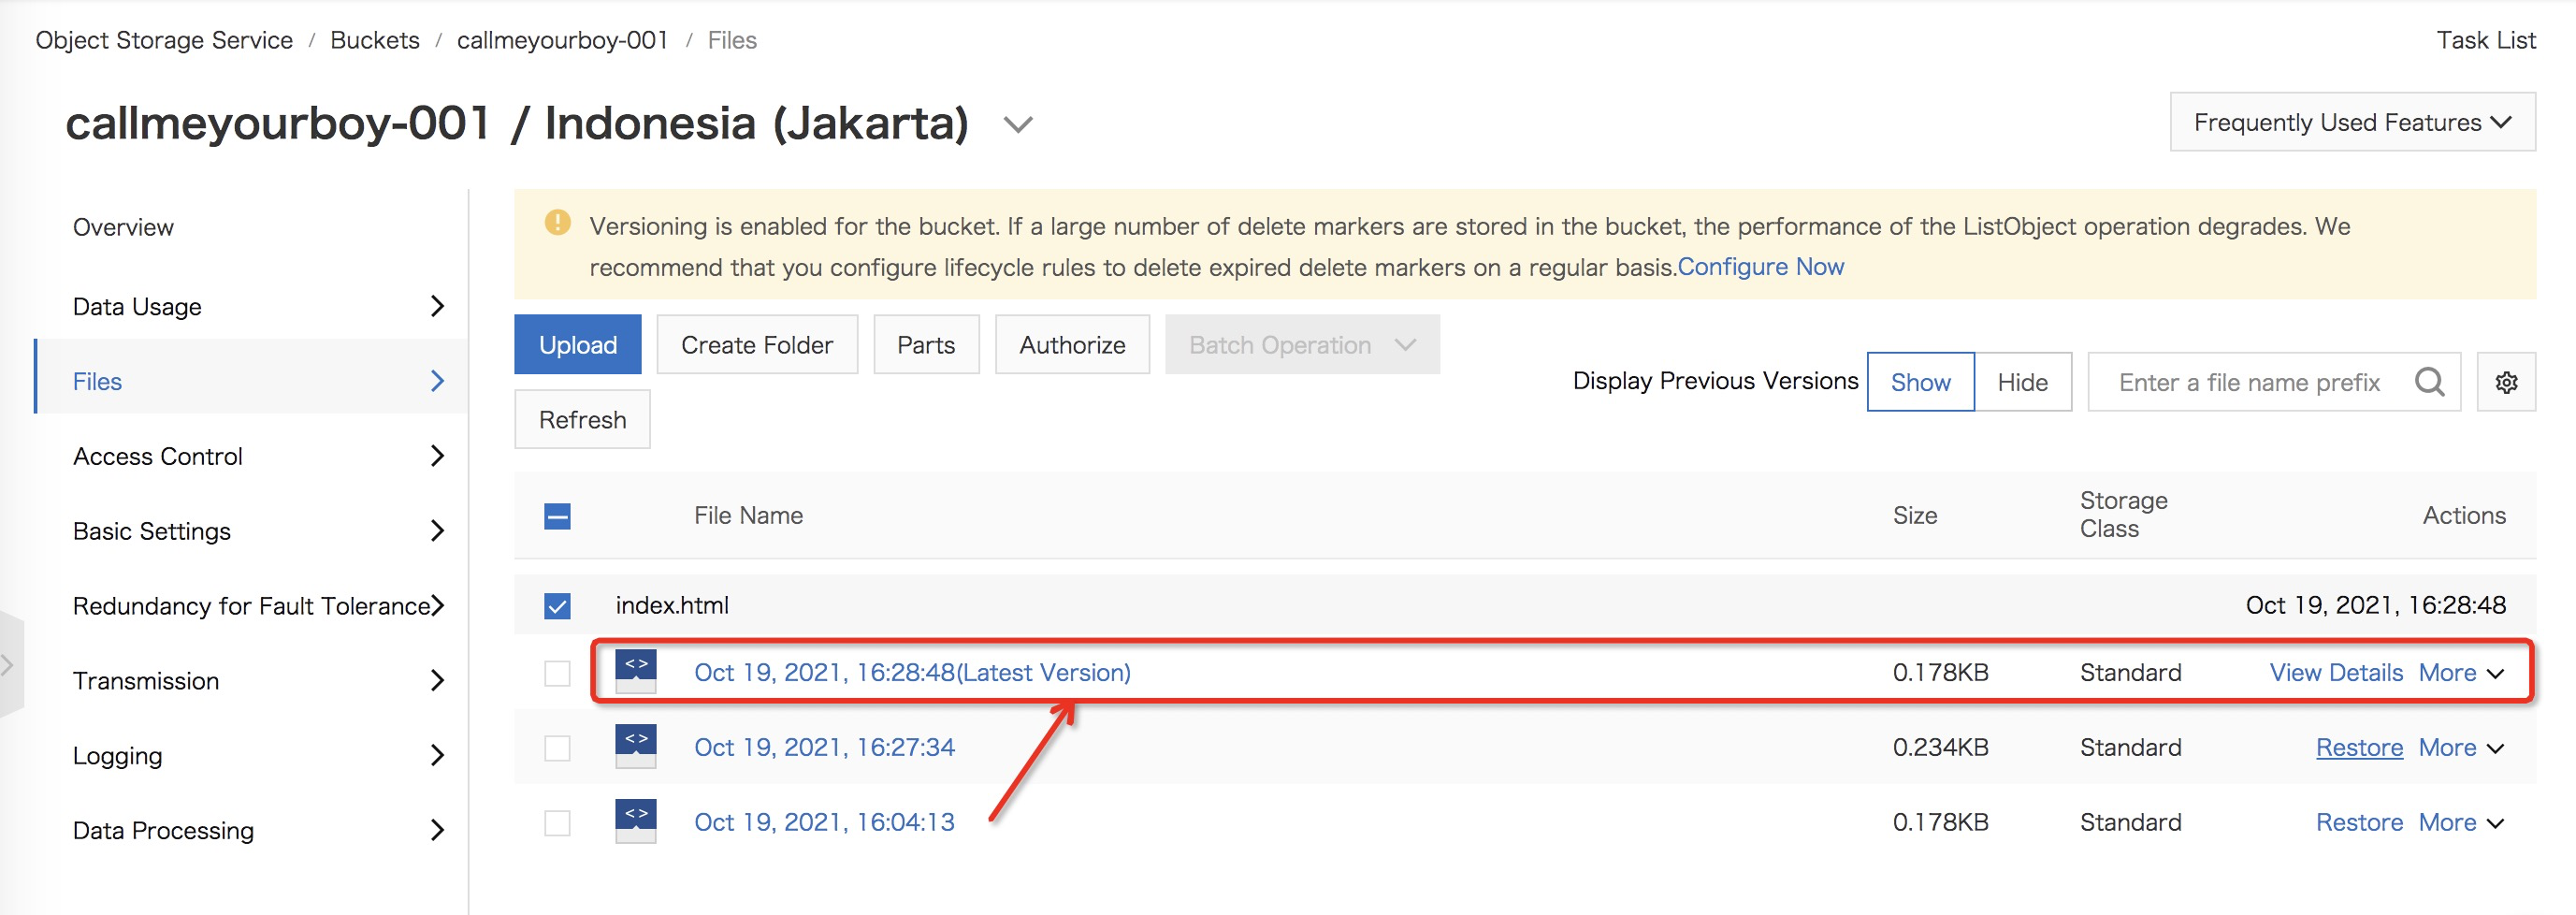
Now, your data is recovered and I’m happy to see this simple page (again)
Wow, few features already been used!
Maybe, this will be first session for exploring OSS. Just chill and wait for another session. See ya!
