
Pritunl is an open source tool which having server monitoring and user management. Pritunl doesn’t need high spec VPS (VM Server), support installation on various Linux operating systems. Pritunl mostly used as VPN Server. VPN Server used to provide you access to other websites safer by changing connection line through server and hide the data exchange.
Preliminary
In this article, we are going to use CentOS 7.8 as our Image.

For billing method, better use Pay-As-You-Go if you don’t have subscription plan to reduce cost.

For instance type, it depends on you. I choose low spec (1 vCPU and 1 GB Memory).

Disk, i set it default.
We need Public IP, so we assign Public IP on our ECS instance. And for Bandwidth Billing, it depends on you. Pay-By-Bandwidth seems expensive.

For VPC and VSwitch, i think you can easily set it.
For security group, you will need to add/open port for Pritunl Service. We will add the port later, because we still don’t know what port will be used.
Next, for credential. It depends on you. Using Key Pair is the best practice in logon credential, but if it’s for experimental purpose, it’s ok.

If the requirement already been fulfilled, you can preview your order and create. [don’t forget to confirm T&C].
If it already been created, you can see it on your ECS console.

Firstly, we will add repo for mongodb and repo for pritunl as well.
Secondly, install epel-release package.
Thirdly, edit selinux config.
Then, install pritunl.
Next, install mongodb
After that, you need to setup key for pritunl, you need to setup authentication, add organisation, add user, add server and attach your server to organisation you choose.
Finally, your Pritunl server can be accessed and enter your setup key there.
Implementation
1. Add Repo
1.1 For MongoDB
# vi /etc/yum.repos.d/mongodb-org-3.4.repo

1.2 For Pritunl
# vi /etc/yum.repos.d/pritunl.repo

2. Install Epel-Release package
# yum -y install epel-release
3. Edit Selinux. Config
# vi /etc/selinux/config
# This file controls the state of SELinux on the system.
# SELINUX= can take one of these three values:
#     enforcing - SELinux security policy is enforced.
#     permissive - SELinux prints warnings instead of enforcing.
#     disabled - No SELinux policy is loaded.
SELINUX=enforcing .
# SELINUXTYPE= can take one of three two values:
#     targeted - Targeted processes are protected,
#     minimum - Modification of targeted policy. Only selected processes are protected.
#     mls - Multi Level Security protection.
SELINUXTYPE=targeted
Change config from “SELINUX=enforcing . ” to SELINUX=Disabled

4. Instalation
4.1 For Pritunl
We need to add these keys before installation
# gpg –keyserver hkp://keyserver.ubuntu.com –recv-keys 7568D9BB55FF9E5287D586017AE645C0CF8E292A
# gpg –armor –export 7568D9BB55FF9E5287D586017AE645C0CF8E292A > temp.tmp; sudo rpm –import temp.tmp
And then, remove the temp key file.
# rm -f temp.tmp
Then, freely to install the pritunl
# yum -y install pritunl
4.2 For MongoDB
For installing MongoDB, you can execute this syntax.
# yum -y install mongodb-org
After installation already been finished, you can start and enable both services by these syntax.
# systemctl start mongod pritunl
# systemctl enable mongod pritunl
5. Setup Pritunl
5.1 Key
Generate the setup key by execute this syntax.
# pritunl setup-key
Now, go to your https://IP-ADDRESS

Enter the setup key (after you execute the previous syntax, copy-paste on the form.
5.2 Authentication
After you click save, it will redirect you to login page.

execute this syntax to get your username and password.
# pritunl default-password

Next, you will be redirected to dashboard page and need to change your authentication/initial setup.

6. Config on Web
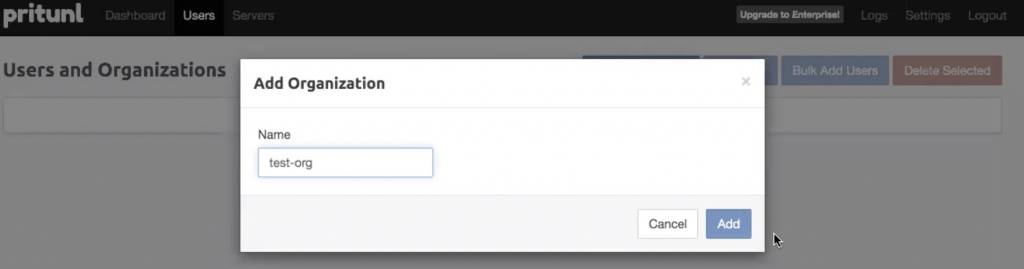
6.1 Add Organisation
On left section (upper left) you can see the Users menu, click it and go to add organization.

6.2 Add User
On left section (upper left) you can see the Users menu, click it and go to add user.

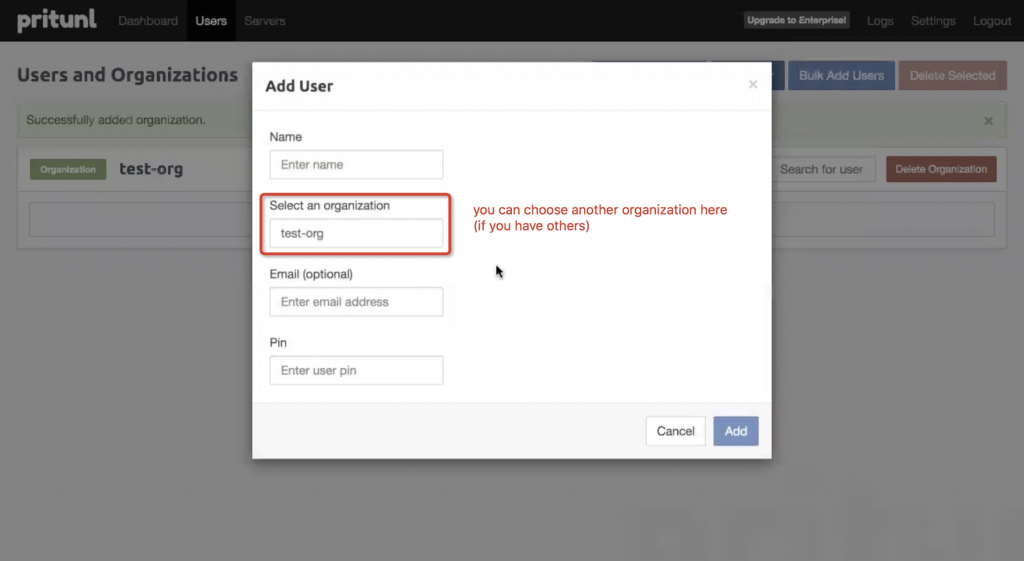
Set the others as default, fill the name and select an organisation.

6.3 Add Server
On left section (upper left) you can see the Server menu, click it and go to add server.


Nb. Don’t forget to add your incoming traffic (ingress) on Security Group. (Choose UDP protocol and set port as you mentioned on Pritunl same like on Security Group)

6.4 Attach server to your organisation
On left section (upper left) you can see the Server menu, click it and go to attach organisation.


After organisation was attached, you can start server.
Verification
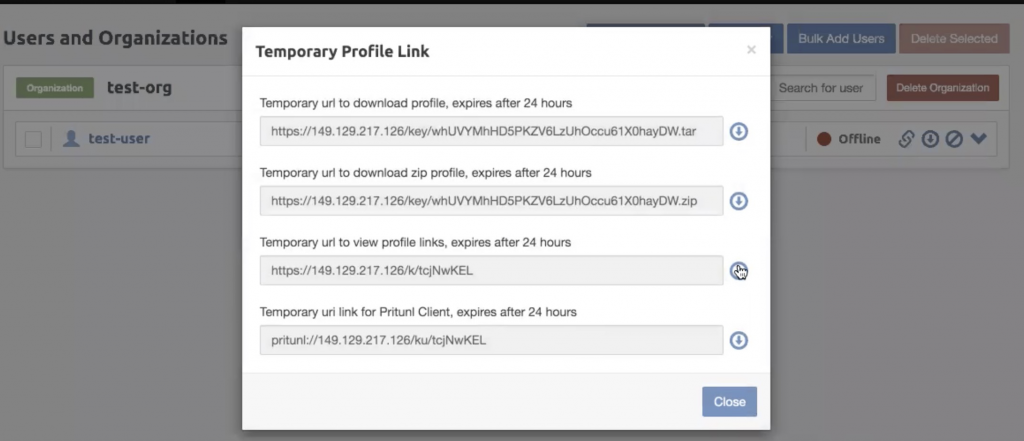
As testing user, we will try the VPN. As opening, you need to copy temporary profile link which including your vpn profile (user account). You can download your user profile (zip/without zip/others), and import your .ovpn to your Pritunl Client.

Already been connected to vpn server.
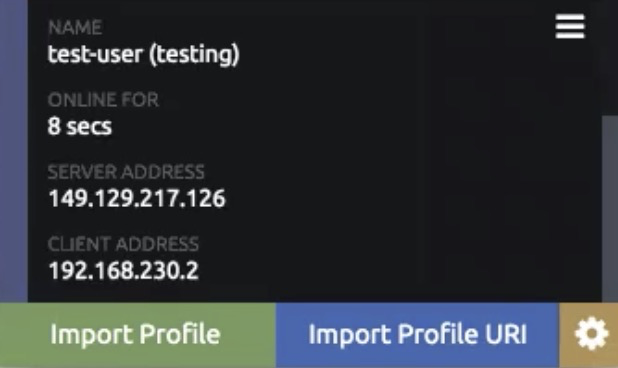
When i check my IP, it returns my ECS’s Public IP. Because we communicate through the connection of ECS’s Public IP.

